Upcycle Broken Terra-Cotta Pots into Garden Art & Function
Turn broken terra-cotta pots into creative garden art and functional planters. Simple DIY upcycling ideas to add charm and sustainability to your garden.

"Discover 6+ creative ways to upcycle broken terra-cotta pots into garden art & function. Eco-friendly DIY ideas for edging, markers, drainage & more."
Introduction To Terra-cotta Pot Art - DIY Guide
Ever tossed a cracked terra-cotta pot straight into the trash? You’re not alone. Most of us see broken pots as useless scraps. But here’s the truth: those shards are actually DIY gold.
In fact, gardeners around the world are turning broken pots into garden edging, fairy houses, mosaics, and even plant drainage hacks. The best part? It’s free, eco-friendly, and adds instant character to your space.
Today, I’ll walk you through 6 creative ways to upcycle broken terra-cotta pots—so you’ll never look at a cracked planter the same way again.
10 Genius DIY Terracotta Pot Ideas for Home & Garden Decor (Perfect for Fall 2025!)
"Enjoy this curated video. All rights and credit go to the original YouTube creator."
1. Turn Shards into Plant Drainage Helpers
Every healthy plant starts with good drainage. Instead of buying rocks or clay pellets, just line the bottom of your pots with terra-cotta shards.
- Tools/Materials Needed: Hammer (optional), gloves, the broken pieces.
- Step 1: Break large chunks into smaller flat pieces.
- Step 2: Layer them at the bottom of pots before adding soil.
- Step 3: Plant as usual—your roots stay happy, and water drains better.
Pro Tip: Terra-cotta naturally wicks away moisture, making it perfect for preventing soggy soil.
2. Create Charming Garden Markers
Tired of forgetting which herb is which? Use shards as rustic plant markers.
- Write directly on the terra-cotta with a permanent marker or chalk pen.
- Stick the shard into the soil at an angle for a sturdy marker.
- Larger pieces can double as decorative labels for raised beds.
Watch Out: Don’t leave chalk markers in heavy rain—they’ll fade. Seal with a clear coat if outdoors year-round.
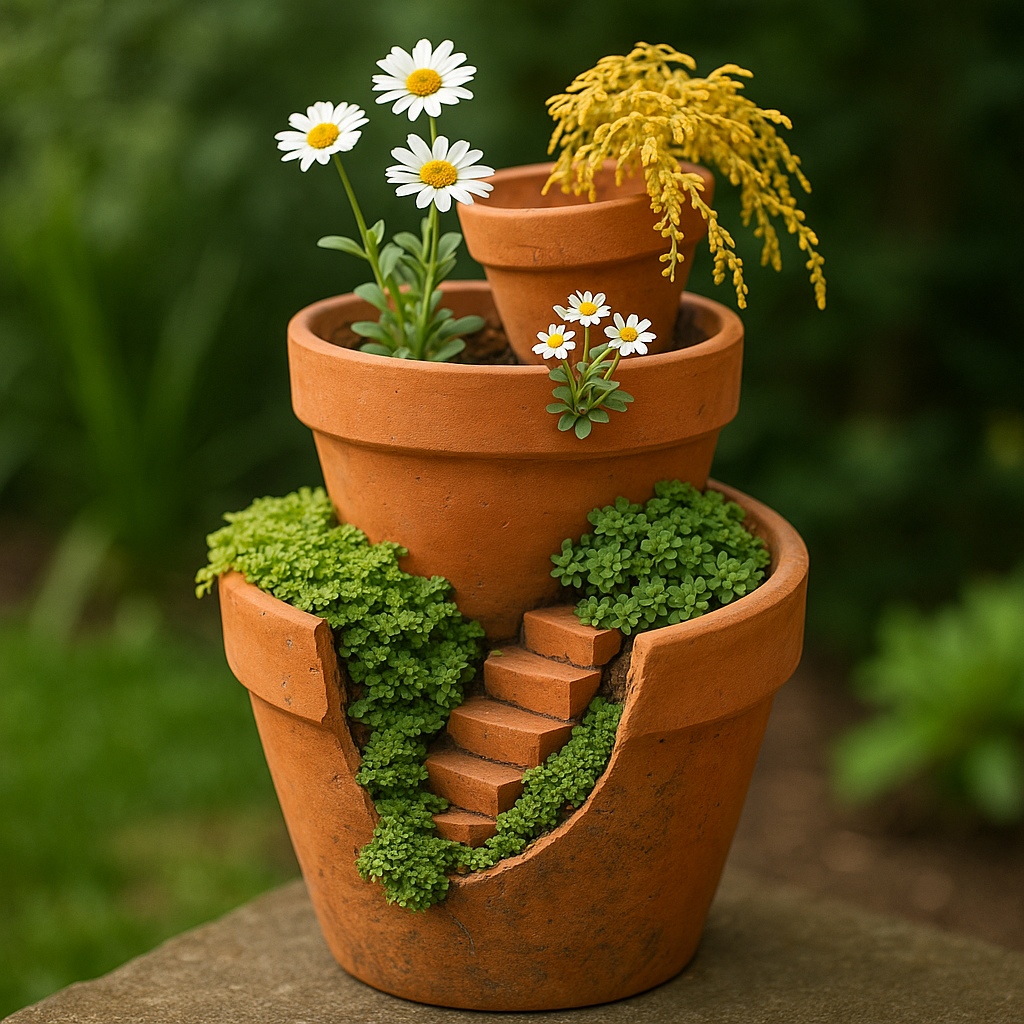
3. Build a Fairy Garden with Layers
Fairy gardens are trending big right now—and broken pots are the perfect base.
- Step 1: Stack shards inside a larger planter like stairs.
- Step 2: Fill each level with soil, moss, or succulents.
- Step 3: Add tiny figurines, fairy doors, or pebbles.
The cracked edges create a whimsical, layered effect that looks magical in any corner of your yard.
4. Use Shards for Garden Edging
Instead of pricey stone edging, line your beds with upright pot shards.
- Push shards halfway into the soil to form a natural border.
- Mix large and small pieces for texture.
- Great for herb gardens, pathways, or flowerbeds.
Pro Tip: For a polished look, bury the bottom inch of each shard evenly so they stand firm.
5. Craft a Mosaic Stepping Stone
Got a bunch of shards? Create a mosaic garden path.
- Tools/Materials Needed: Concrete stepping stone mold, quick-set cement, gloves.
- Step 1: Pour cement into a mold.
- Step 2: Arrange shards into patterns before it sets.
- Step 3: Seal for outdoor durability.
Every step in your garden becomes a piece of art.
6. Build a Micro-Habitat for Pollinators
Broken pots can also help the environment.
- Stack larger shards loosely to create nooks and crannies.
- Place the stack in a sunny, dry spot in the garden.
- Bees, ladybugs, and beneficial insects will use it as a resting place.
This doubles as decoration and a boost for local biodiversity.

Wrapping It Up
Broken terra-cotta pots aren’t trash—they’re opportunities. Whether you’re improving drainage, marking plants, or crafting fairy gardens, upcycled shards bring beauty and function back into your space.
Next time one cracks, smile—you’ve got a new project waiting.
Recommended Tools & Materials
- Terra-Cotta Pots (set of 3) – Start fresh or use them as backups when one breaks.
- Chalk Paint Pens – Perfect for labeling shards as garden markers.
- Quick-Set Cement Mix – Ideal for making mosaic stepping stones.
- Gardening Gloves – Always protect your hands when handling sharp edges.