The Ultimate Guide to DIY Textured Canvas Art (The Viral Trend Anyone Can Make)
Create stunning, high-end DIY textured canvas art for less than $30! Our step-by-step guide makes this viral spackle art trend easy for anyone. Try it today!

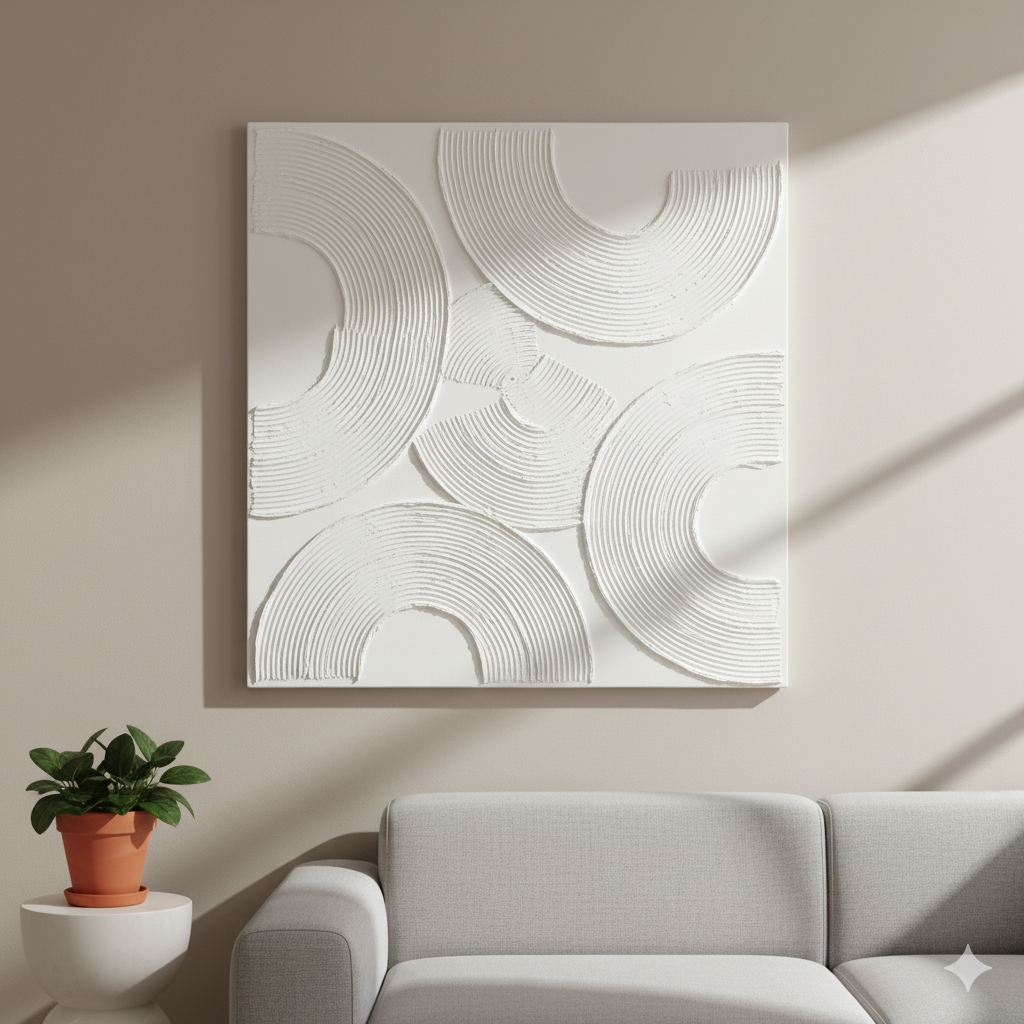
Ever scrolled through a high-end home decor catalog and felt a pang of "I wish I could afford that"? You're not alone. Minimalist, textured wall art is one of the hottest trends in interior design, with single pieces often costing hundreds, if not thousands, of dollars. But what if you could create a stunning, gallery-worthy piece for less than the price of a pizza?
I'm going to show you exactly how to create your own DIY textured canvas art using a secret weapon from the hardware store: joint compound. That's right, the simple spackle used for filling drywall is the key to achieving that expensive, sculptural look. This guide will walk you through every single step, from the materials you'll need to the techniques for creating beautiful, professional-looking textures. Forget artistic talent—if you can spread frosting on a cake, you can make this art.
How To Create Textured Abstract Art with a Palette Knife (Easy Acrylic Technique)
"Enjoy this curated video. All rights and credit go to the original YouTube creator."
Why This Project is a Must-Try
- Incredibly Budget-Friendly: Create a massive piece of art for under $30.
- Beginner-Proof: No prior painting or art skills are required. It's all about creative play!
- Completely Customizable: You can create any size, shape, or design you can imagine. Add color or keep it minimalist white.
- Therapeutic & Fun: There's something incredibly satisfying about creating the textures. It's a great stress-reliever!
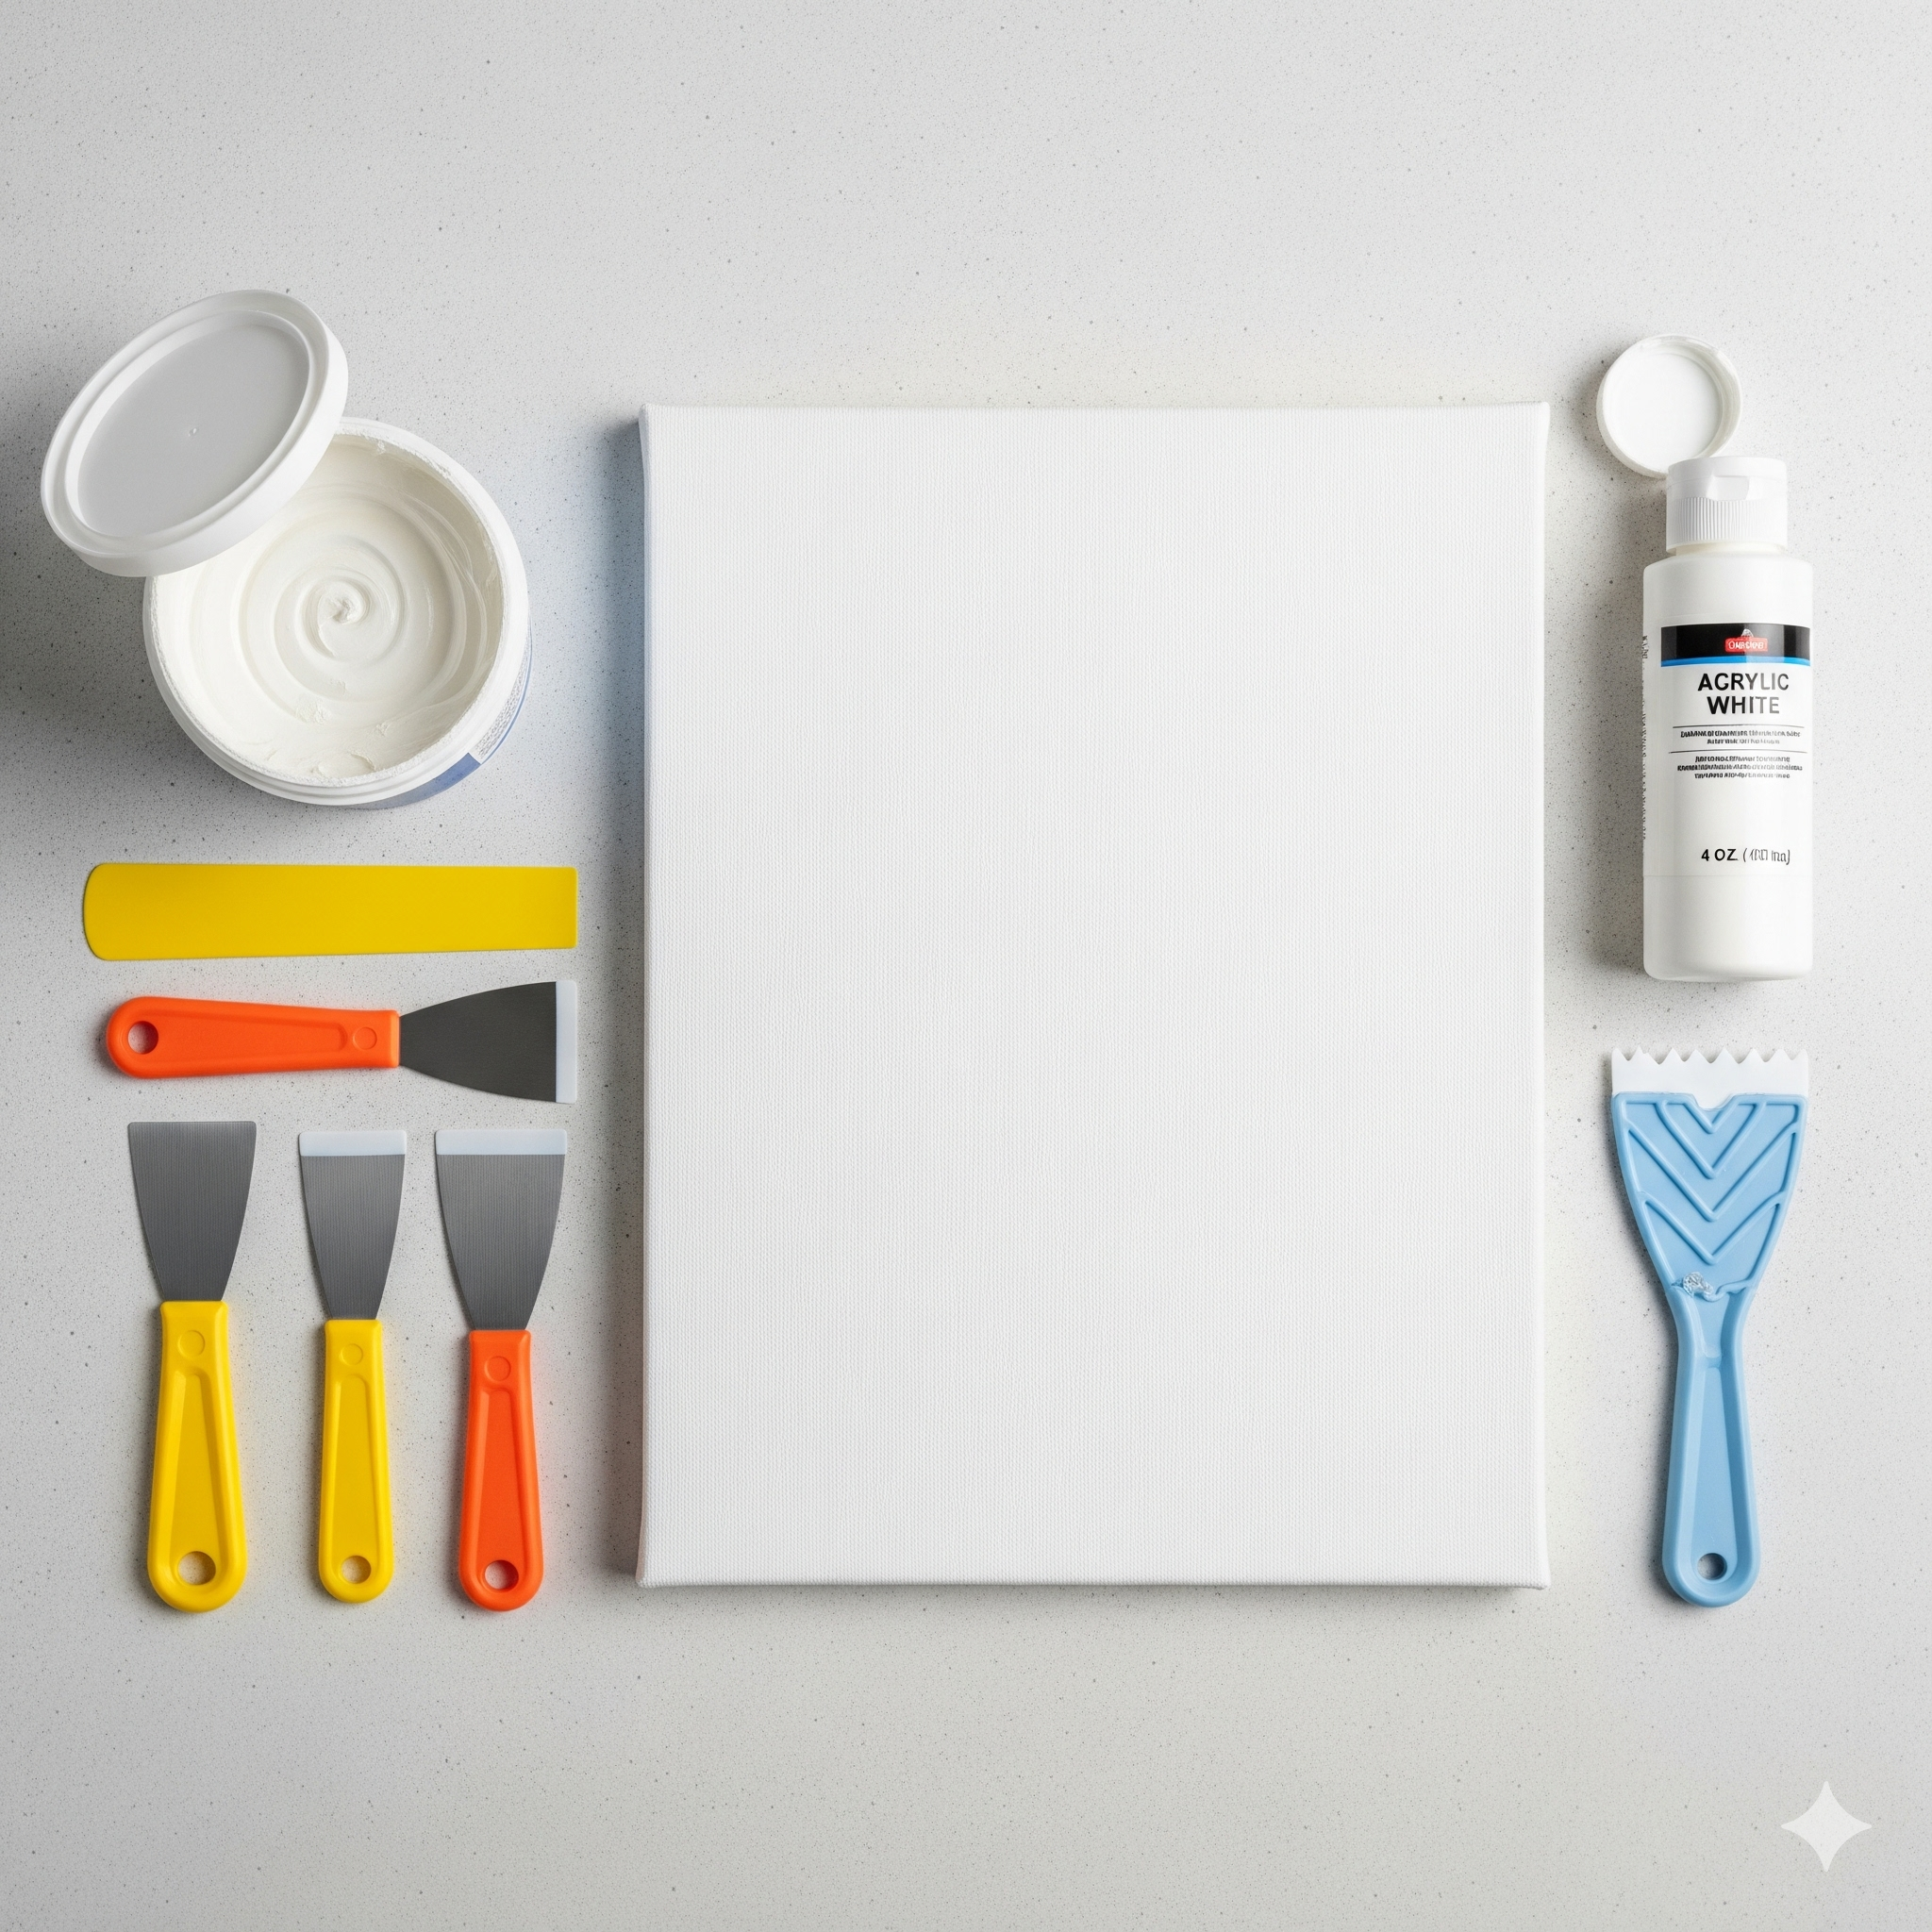
Materials & Tools You'll Need
This project uses simple and affordable supplies, most of which you can find at Walmart or any hardware store.
Shop now for the best prices in canvas art materials at Walmart
Materials:
| Item | Quantity | Notes |
| Blank Canvas | 1 | Any size works! A 24x36 inch is a great starting point for a statement piece. |
| All-Purpose Joint Compound | 1 tub | Pre-mixed is easiest. A small tub is more than enough for several canvases. |
| White Acrylic Paint or Primer (Gesso) | Small bottle | To prime the canvas and mix with the compound. |
| Optional: Acrylic Craft Paint | 1-2 colors | If you want to tint your texture (e.g., beige, taupe, black). |
| Optional: Varnish/Sealer | 1 can | A matte spray sealer can protect the finished piece from dust. |
Tools:
| Tool | Use |
| Putty Knives / Trowels | Set of various sizes |
| Notched Trowel | 1 |
| Mixing Bucket or Bowl | 1 |
| Paintbrush or Foam Brush | 1 |
| Drop Cloth or Newspaper |
Step-by-Step Instructions: Creating Your Masterpiece
Let's get creative. Set aside an hour for the creation process and allow for 24-48 hours of drying time.
Step 1: Prepare Your Canvas & Workspace
First, set up your station. Lay down your drop cloth to protect your floors or table.
Even though your canvas is new, it's a good idea to prime it. This gives the joint compound a better surface to grip. Simply apply a thin, even coat of white acrylic paint or gesso to the entire surface of the canvas with your paintbrush. Let it dry completely (usually 20-30 minutes).
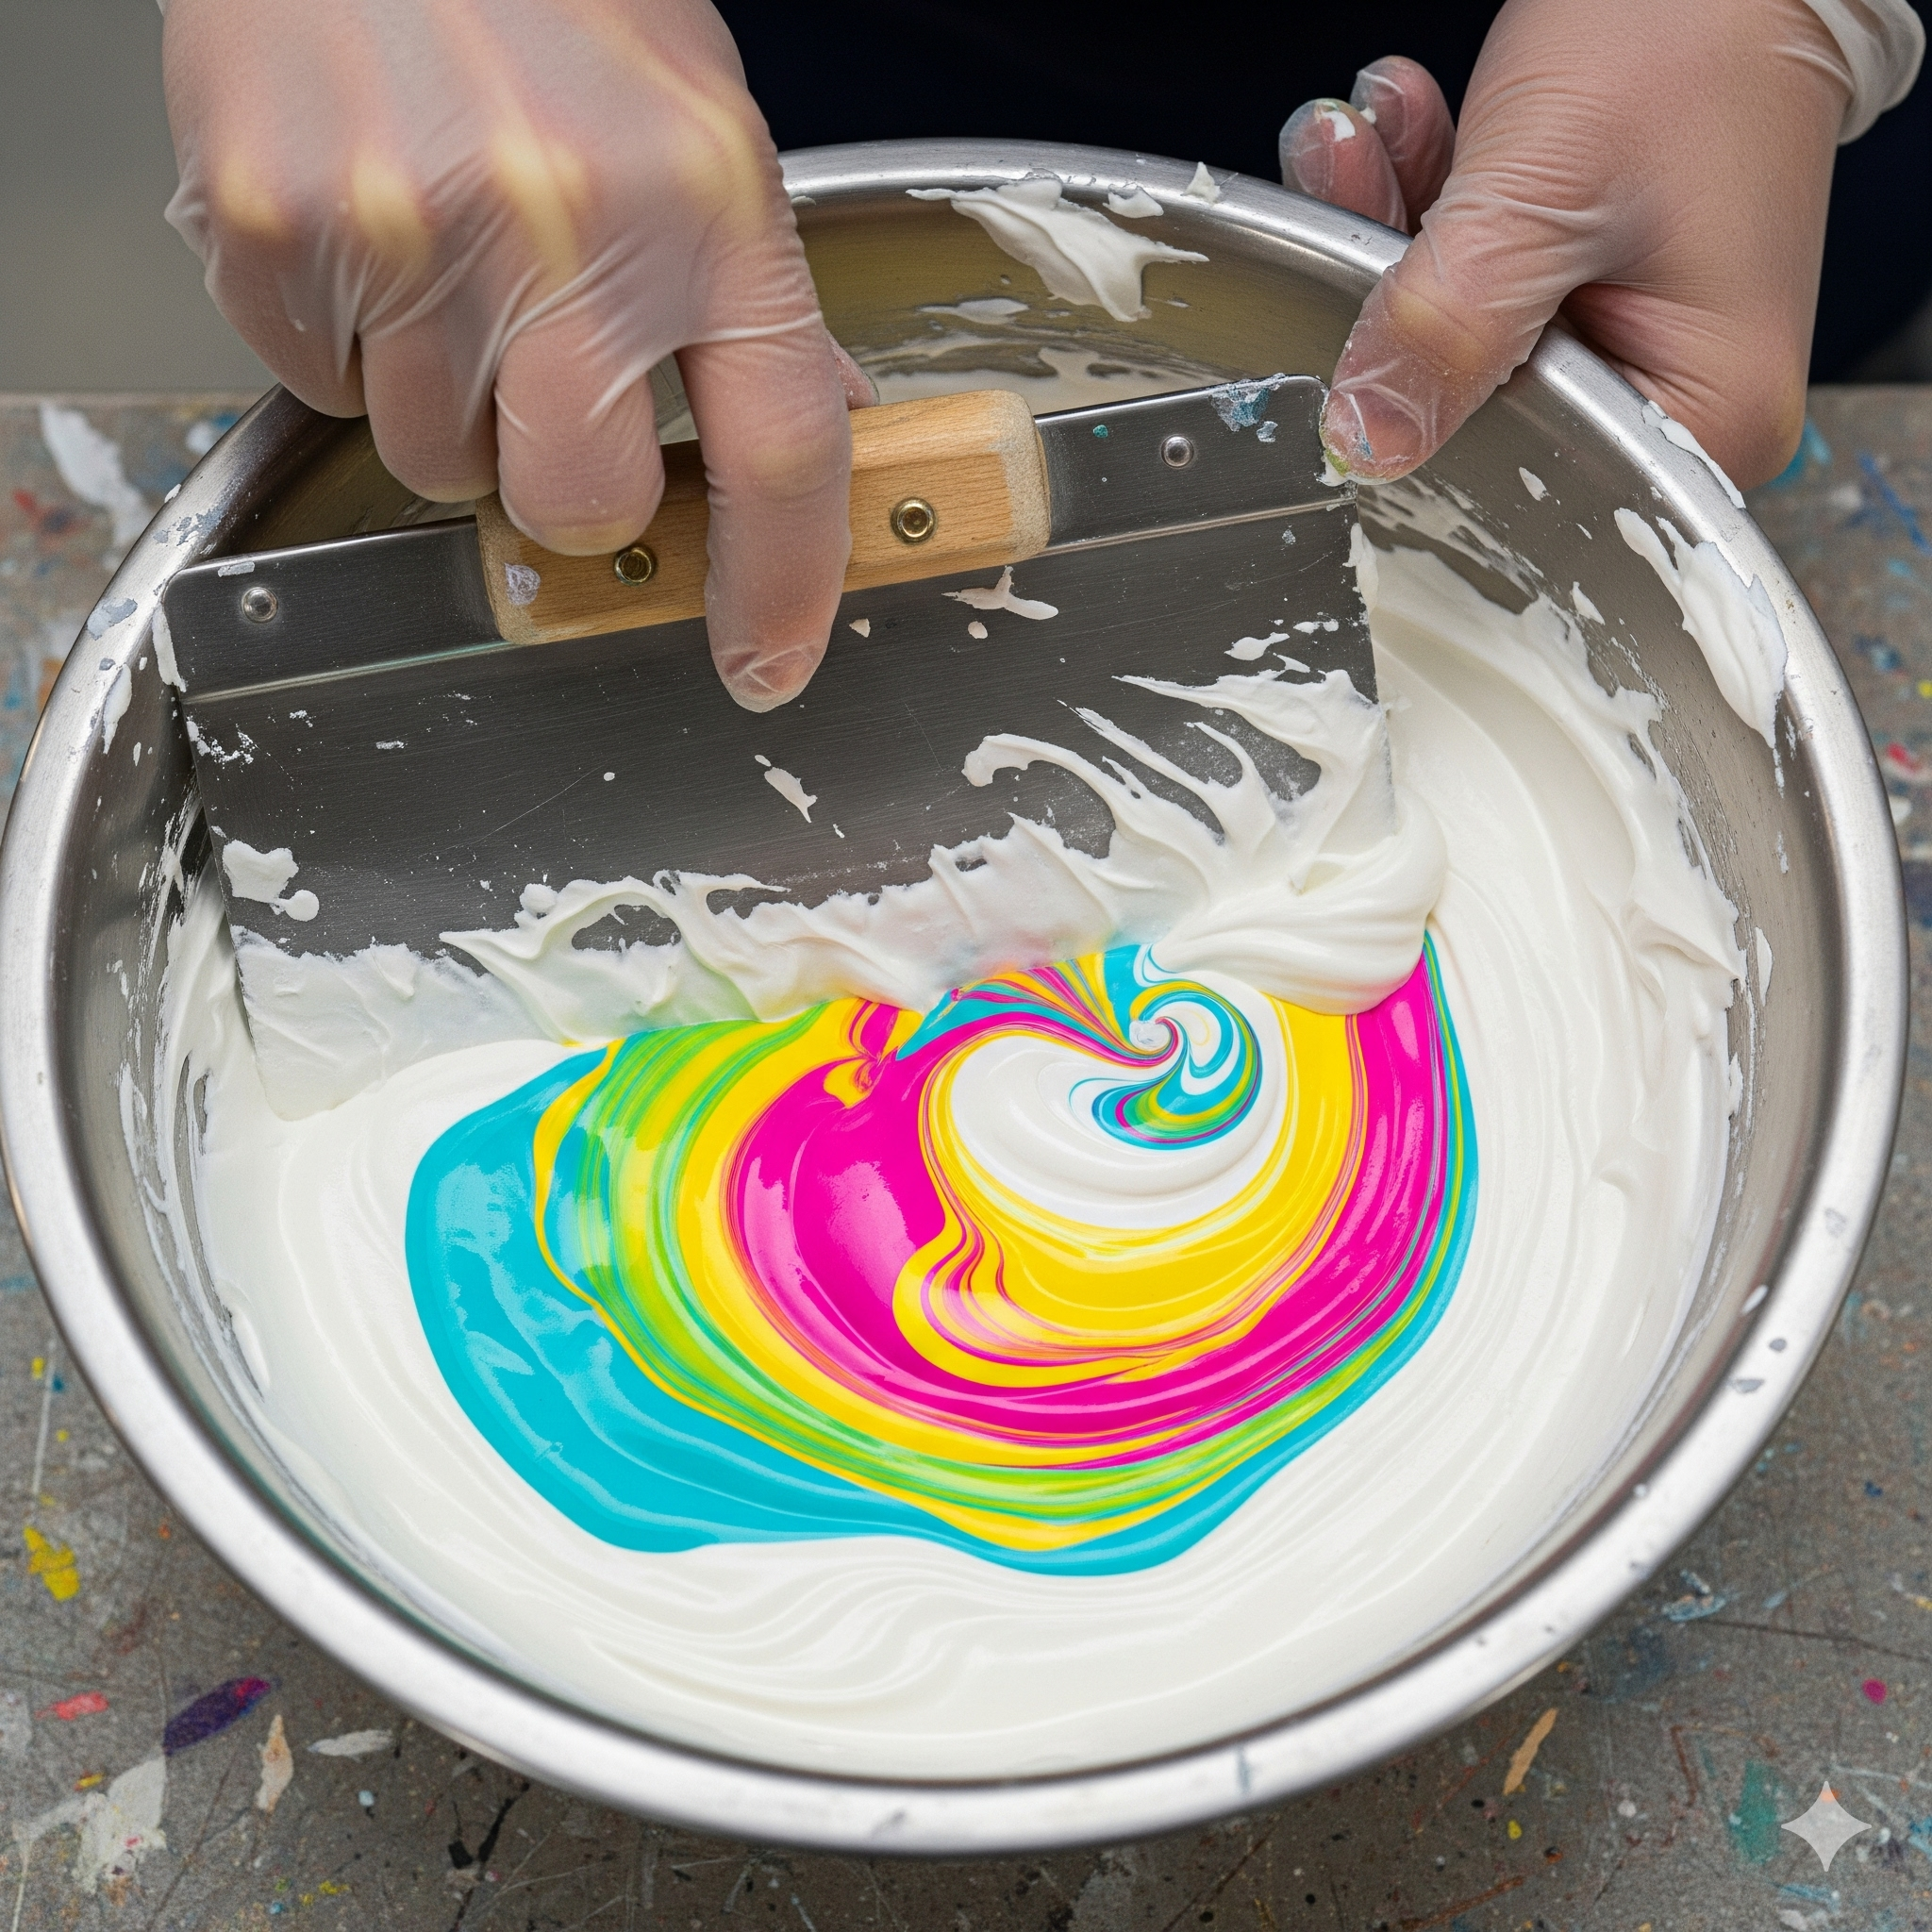
Step 2: Mix Your Texture Compound
Now for the fun part. Scoop a generous amount of the pre-mixed joint compound into your mixing bucket. Think about how much you'll need to cover the canvas in a thick layer—you can always mix more.
Add a good squirt of the white acrylic paint to the compound. A ratio of about 4 parts joint compound to 1 part paint is a good starting point. This paint serves two important purposes:
- It helps prevent the compound from cracking as it dries.
- It ensures the final color is a bright, true white, as joint compound can dry to a dull gray.
Want to add color? This is the time to do it. Add a few drops of your chosen acrylic craft paint and mix thoroughly. Start with less paint and add more until you reach your desired shade. A warm beige or soft terracotta are popular choices.
Mix everything together until it's smooth and has the consistency of thick frosting.
Step 3: Apply the First Layer
Scoop up some of your mixture with a large putty knife and begin applying it to your canvas. Don't worry about making it perfect yet. The goal here is to cover the entire canvas with a relatively even, thick layer of the compound (about 1/8 to 1/4 inch thick).
Spread it around just like you're icing a cake. Cover the canvas from edge to edge.
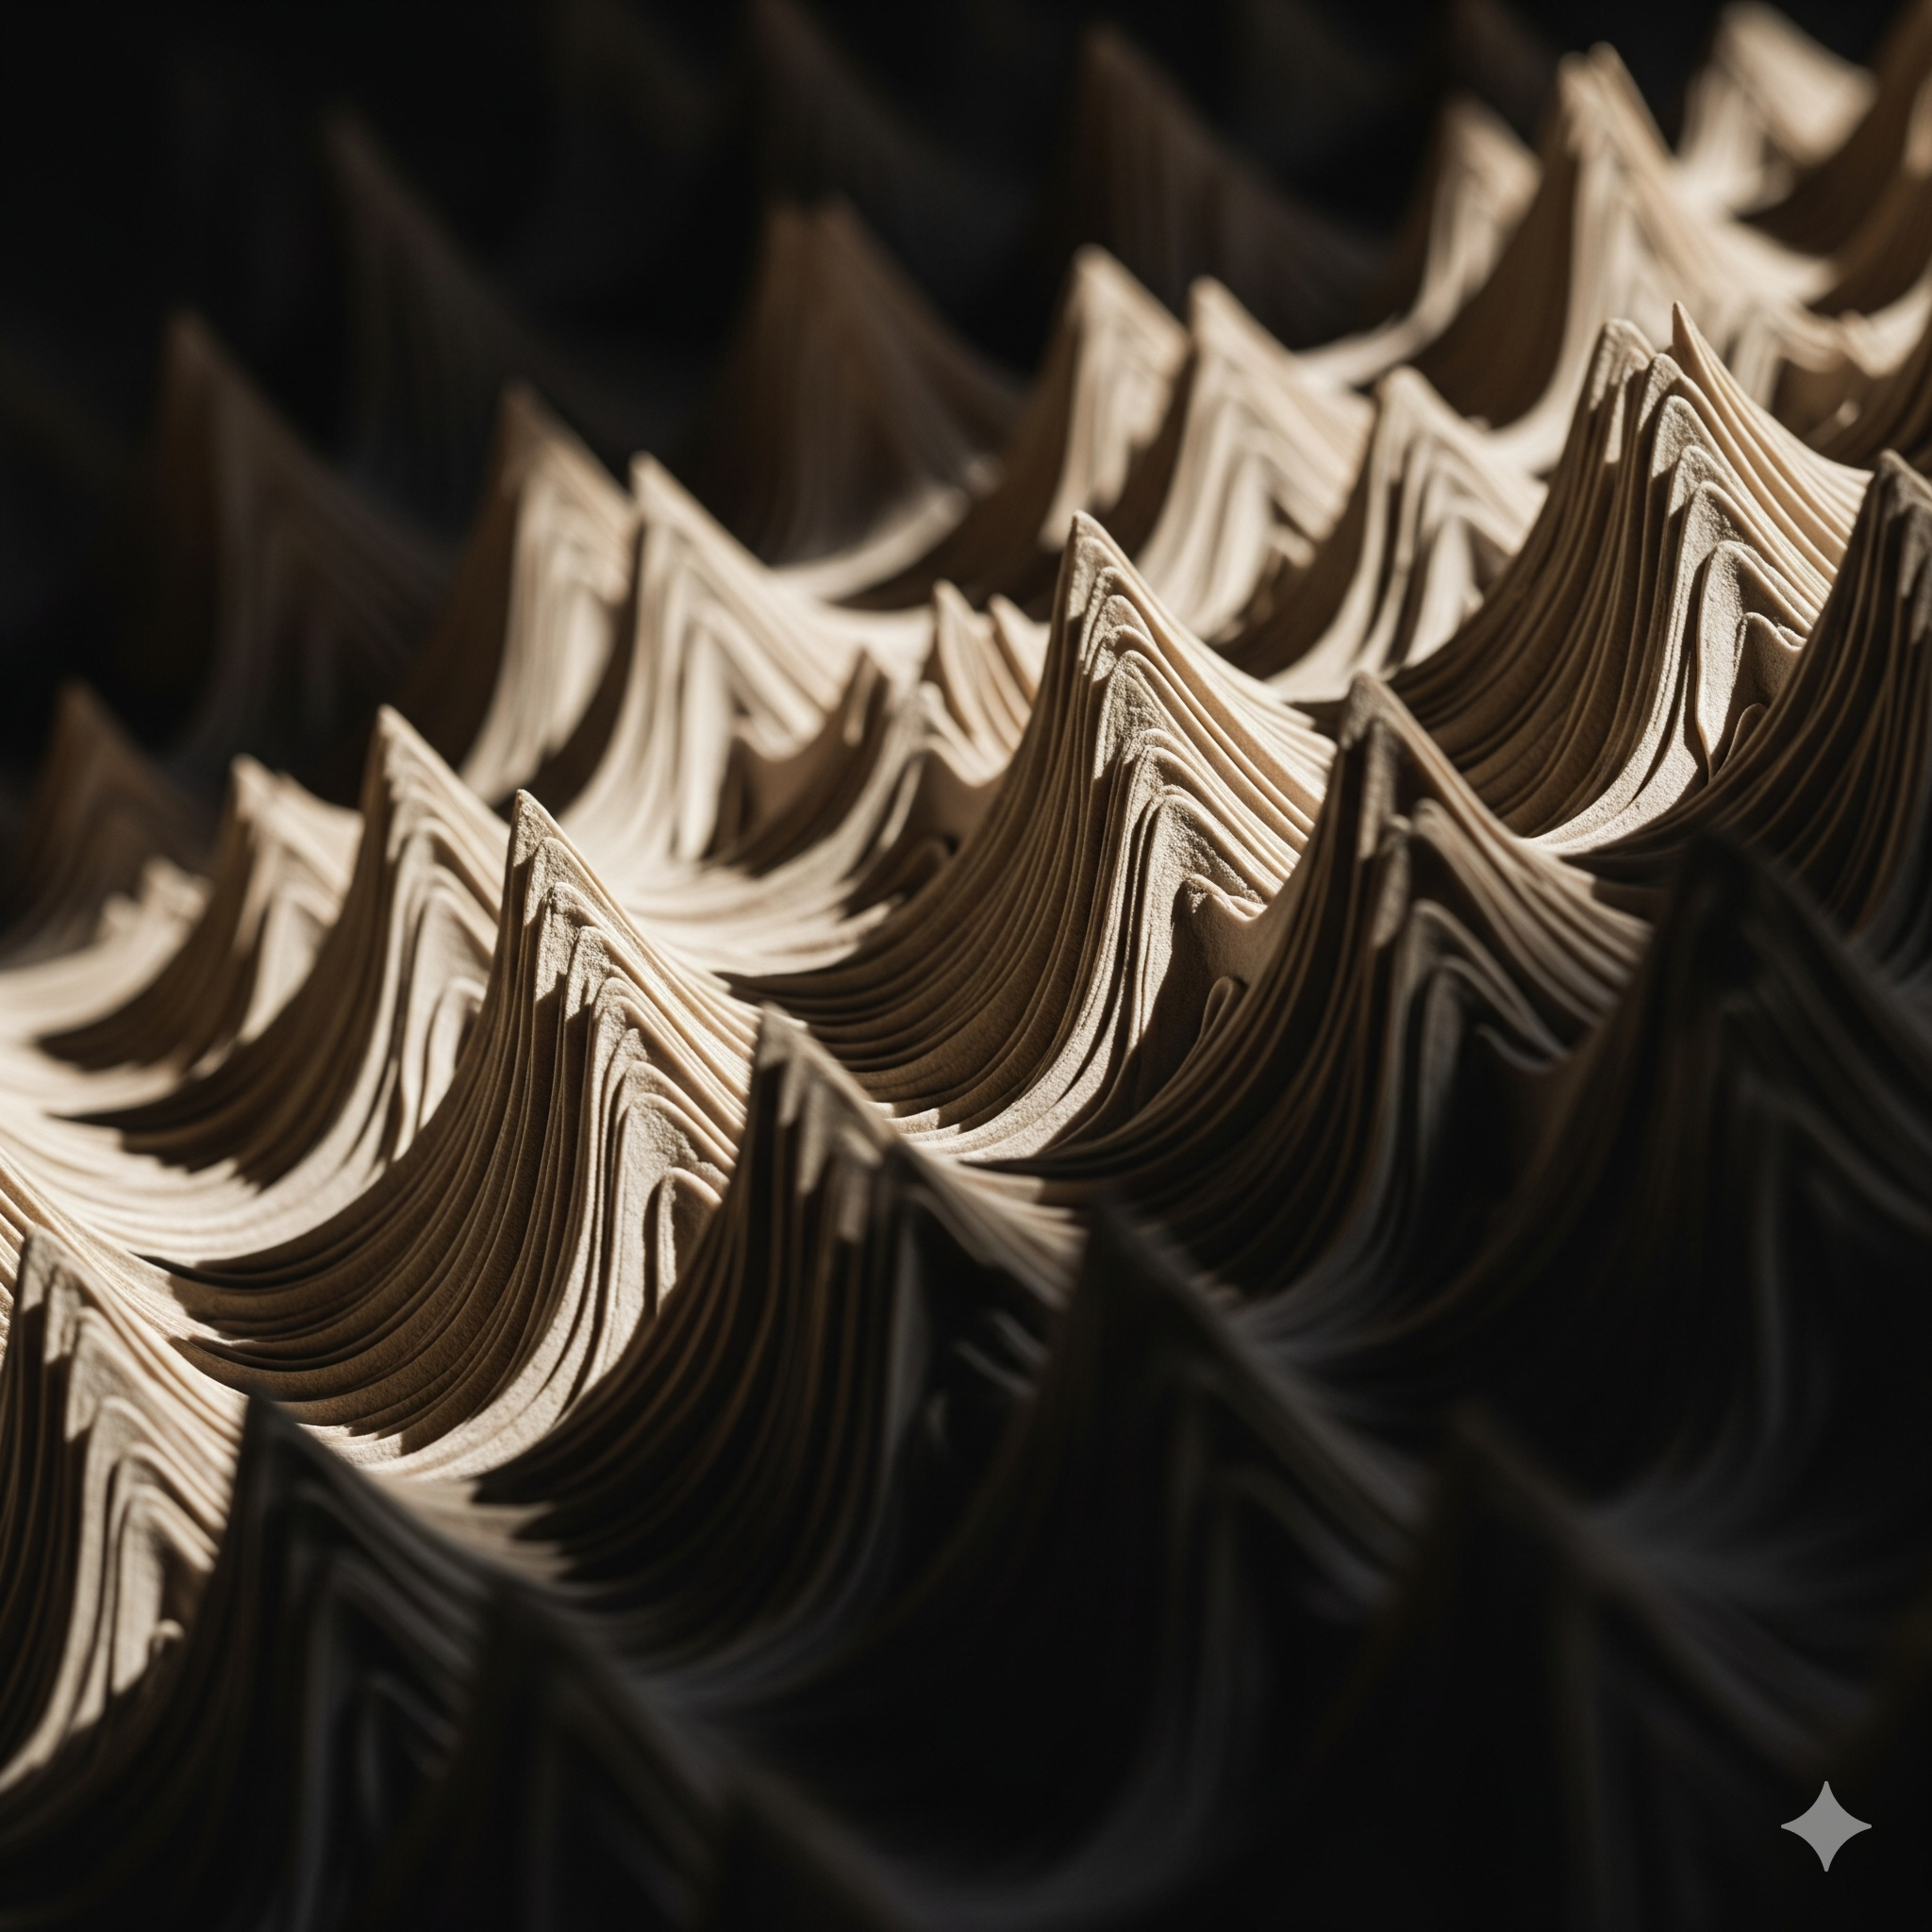
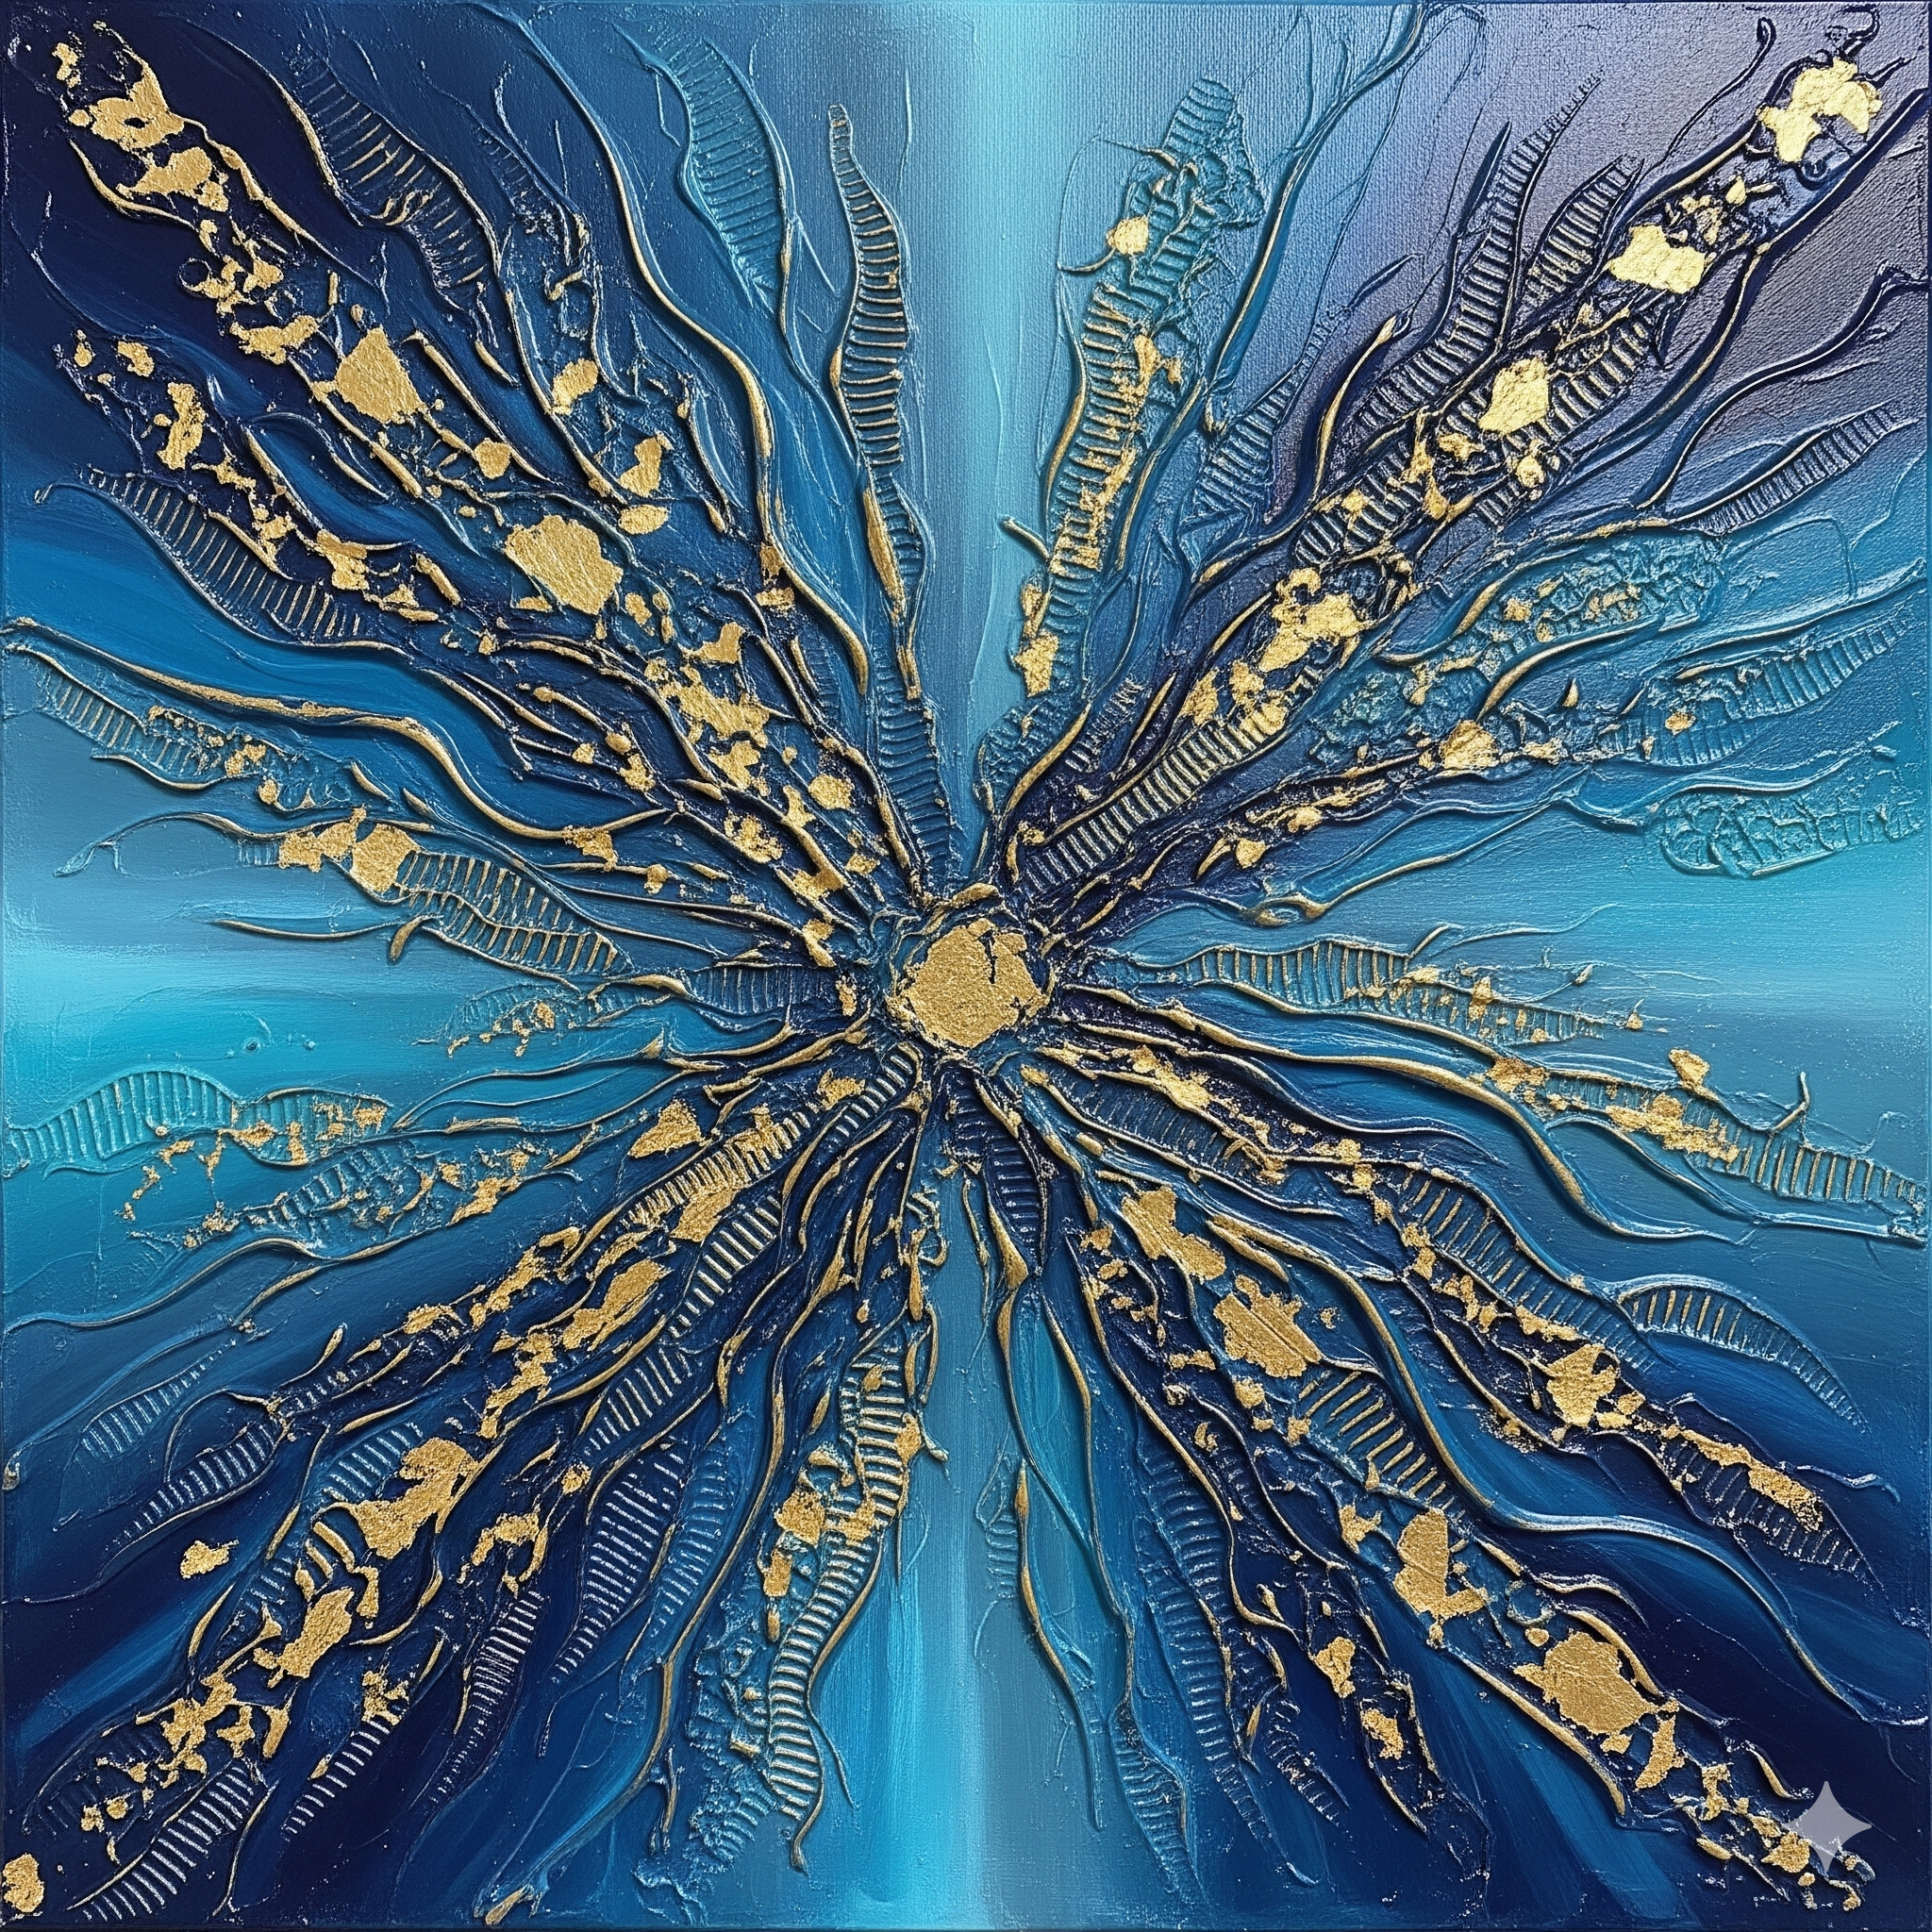
Step 4: Create Your Texture!
This is where your creativity takes over. There are no rules here, only techniques. Use your various tools to create patterns in the wet compound.
Here are some popular ideas:
- The Comb: Take your notched trowel and drag it straight down the canvas to create clean, uniform ridges.
- The Swoop: Use a flat putty knife. Press it into the compound and "swoop" it in an arc, lifting at the end. Repeat this to create a pattern of beautiful arches.
- The Stipple: Gently press the flat side of a putty knife or even a sponge into the compound and lift straight up to create small, organic peaks.
- The Wave: Use your fingers or the edge of a small putty knife to create soft, wavy lines across the canvas.
Pro Tip: Don't be afraid to experiment! If you don't like a section, you can simply smooth it over with your putty knife and try again. Work until you're happy with the overall design.
Step 5: Dry, Dry, Dry
This is the most important—and most difficult—step: patience. Lay the canvas flat in a well-ventilated area where it won't be disturbed.
Drying time will vary based on how thick you applied the compound and the humidity in your area. It will typically take 24 to 72 hours to dry completely. It's fully cured when it's hard to the touch and uniform in color. Resist the urge to touch it while it's drying!
Step 6: Seal Your Artwork (Optional)
Once your art is completely dry, you may notice some fine dust. You can gently brush this off with a soft, dry paintbrush.
To protect your piece from dust and moisture for the long term, you can apply a sealer. A matte clear spray varnish is the best option. It will provide protection without adding any unwanted shine. Take your canvas outside or to a well-ventilated space and apply 1-2 light, even coats, letting it dry between coats.
Conclusion: Display Your Custom Art with Pride!
That's it! You've just created a piece of stunning, high-end DIY textured canvas art that is 100% unique to you. Find the perfect spot on a blank wall, hang it up, and get ready for the compliments to roll in. When someone asks, "Where did you get that amazing piece?" you get to have the immense satisfaction of saying, "I made it."
What design will you create? Share your masterpieces and inspire others to unlock their inner artist!
Frequently Asked Questions
What kind of joint compound is best for textured art?
An all-purpose, pre-mixed joint compound is the easiest and most effective choice. It's ready to use right out of the tub. Avoid "hot mud" or quick-setting types that you have to mix with water, as they dry too quickly for this project.
Can I paint my textured art after it dries?
Absolutely! While it's easier to tint the compound before applying, you can certainly paint it after it's fully cured. Use acrylic paints and apply with a brush or even a paint sprayer for the best coverage over the complex textures.
My joint compound cracked after drying. What did I do wrong?
Cracking usually happens for two reasons: the compound was applied too thickly, or you didn't mix in enough acrylic paint/primer. The paint acts as a binder that adds flexibility. You can easily fix small cracks by filling them with a bit more of the compound mixture and letting it dry.
How do I hang a heavy textured canvas?
The joint compound adds significant weight. For larger canvases, it's best to use two nails or screws spaced apart to distribute the weight evenly. For very large or heavy pieces, using a French cleat or heavy-duty picture wire secured to the wooden frame is the safest method.
Art for Every Style. Walls for Every Wallet.
Discover a world of stunning canvas art at Walmart. From bold abstracts to timeless landscapes, find the perfect piece to express yourself without breaking the bank.