How to Install a USB Wall Outlet (Step-by-Step Beginner’s Guide)
Learn how to install a USB wall outlet safely and easily. Step-by-step beginner’s guide with tools, wiring basics, and safety tips to upgrade your home.

In 2025, the tangle of charging bricks and adapters fighting for space in our wall outlets is a universal frustration. Take a look by your nightstand or on your kitchen counter, and you'll likely see a cluttered mess just to keep your phones, tablets, and other gadgets powered up. What if you could eliminate that clutter and streamline your charging routine with a clean, built-in solution? Upgrading to a modern USB wall outlet is one of the most satisfying and practical DIY home improvement projects you can tackle.
While any project involving electrical work might seem intimidating, replacing a standard outlet with a USB-equipped one is surprisingly straightforward, even for a beginner. This guide is designed to walk you through exactly how to install a USB wall outlet safely and confidently. We will cover every part of the process in detail—from shutting off the power at the circuit breaker to wiring the new device—giving you a clear, step-by-step plan to complete this modern upgrade yourself.
DIY: The Easiest Way to Add USB C & USB A Charging Ports to Any Wall Outlet
"Enjoy this curated video. All rights and credit go to the original YouTube creator."
How to Install a USB Wall Outlet (Step-by-Step Beginner’s Guide)
Adding a USB wall outlet is one of the easiest upgrades you can make to your home. Instead of scrambling for phone chargers or bulky adapters, you’ll have a sleek outlet that lets you plug your devices directly into the wall.
The good news? Installing one isn’t rocket science. With just a few tools and about 20 minutes, you can swap out your old outlet for a USB-enabled version — even if this is your very first electrical DIY.
Let’s walk through it together, step by step.
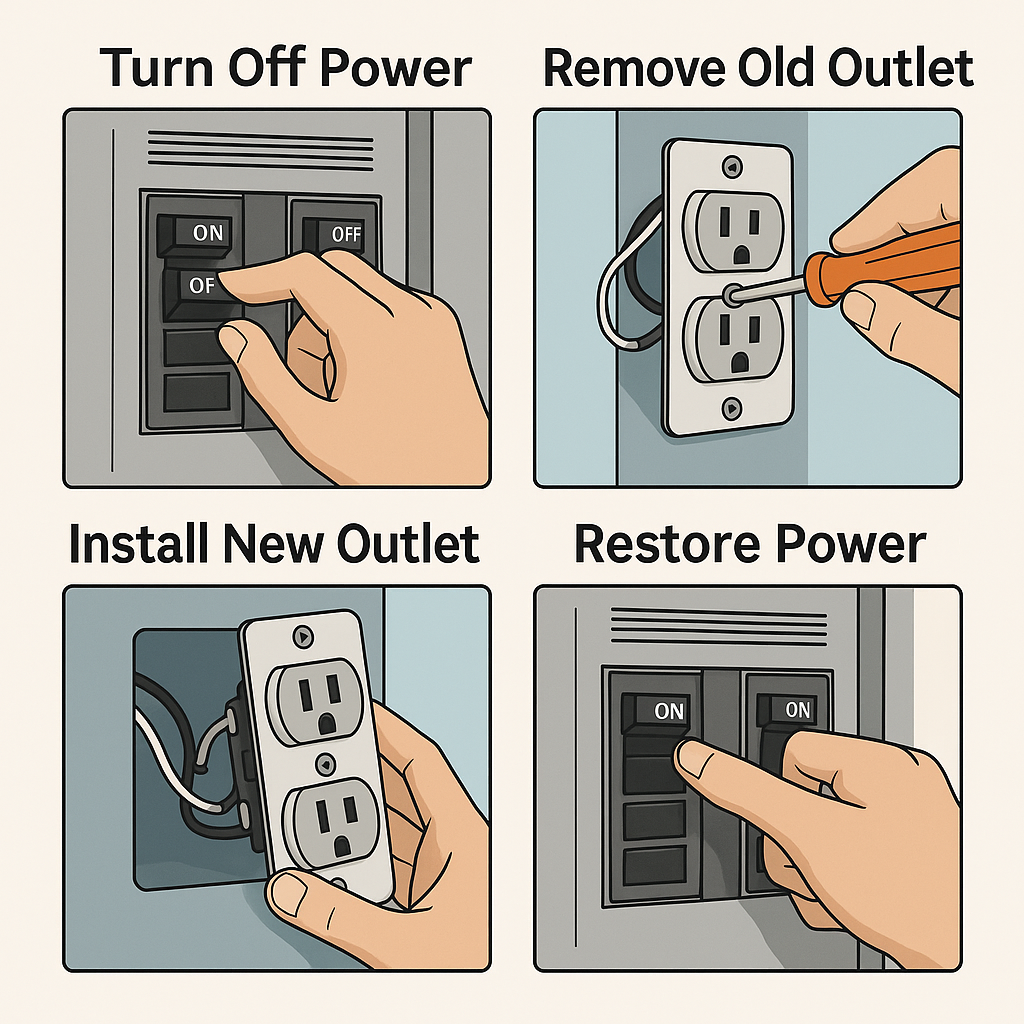
Step 1: Safety First
Before you touch anything, go to your breaker box and turn off the power to the outlet you’re replacing. Use an outlet tester or plug in a lamp to confirm the power is off.
⚠️ Pro Tip: Never skip testing. Even if you think the breaker is off, double-check with an outlet tester.
Step 2: Remove the Old Outlet Cover
Unscrew the cover plate and set it aside. Next, unscrew the outlet itself from the electrical box so you can see the wiring inside.
Step 3: Disconnect the Wires
Gently pull the outlet forward. You’ll usually see three wires:
- Black (hot)
- White (neutral)
- Green or bare copper (ground)
Loosen the screws and carefully disconnect each wire.
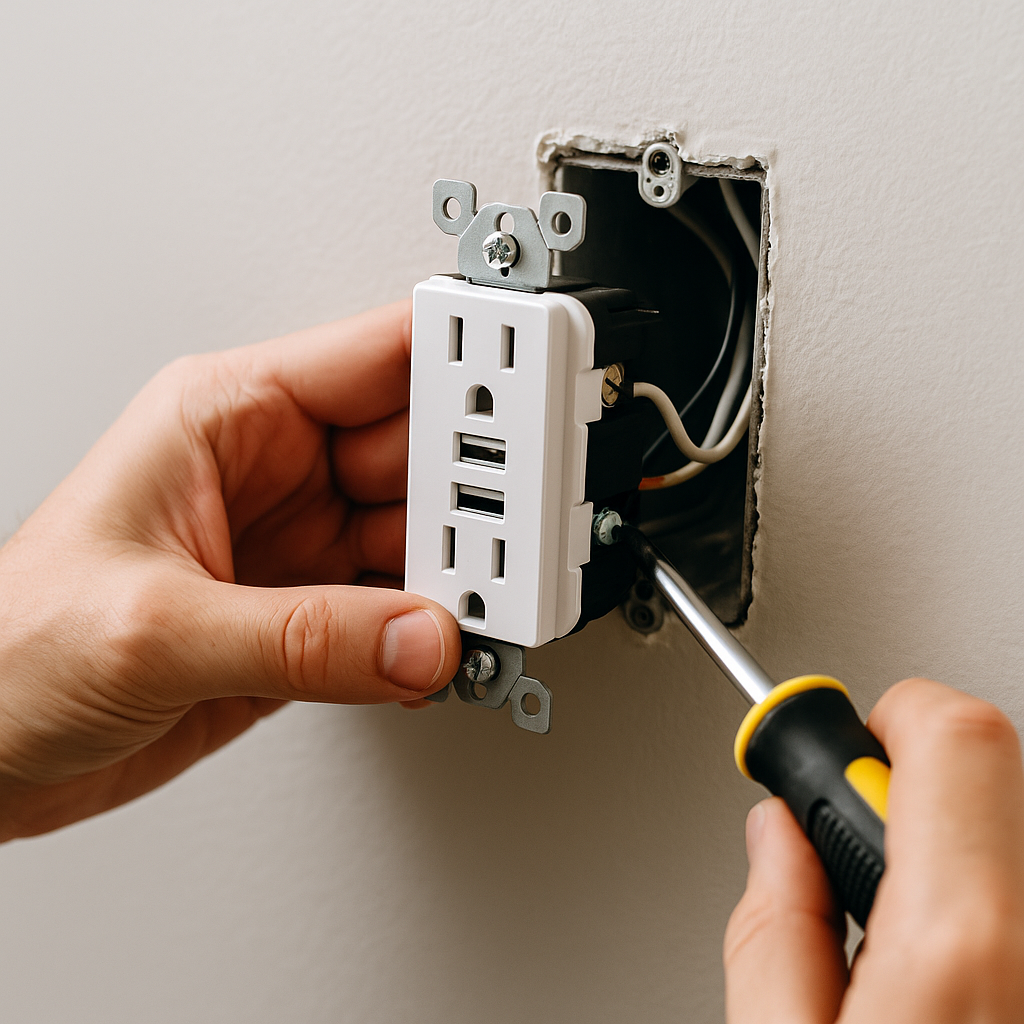
Step 4: Connect the New USB Outlet
Take your new USB wall outlet and connect the wires exactly as they were before:
- Black wire to the brass screw.
- White wire to the silver screw.
- Ground wire to the green screw.
Tighten each screw firmly, making sure there are no loose strands.
Step 5: Install and Secure the Outlet
Carefully tuck the wires back into the box and screw the new USB outlet into place. Add the cover plate.
Step 6: Restore Power and Test
Go back to the breaker box and turn the power back on. Plug in a device to test the standard outlets, then try charging something with the USB ports.
If both work — congratulations, you just upgraded your home!
Recommended Items
These beginner-friendly essentials from Walmart will make your project simple and safe:
- USB Wall Outlet with Dual Ports – sleek and beginner-friendly upgrade.
- Outlet Tester – essential for confirming power is off before you start.
- 6-in-1 Screwdriver Set – the only tool you’ll need for most outlet projects.
- Wall Plate Covers – a fresh finish after your install.
👉 These are affiliate links, which means DIYHows may earn a small commission at no extra cost to you — helping us keep producing free, helpful guides like this.
Final Thoughts
Installing a USB wall outlet is one of those quick wins that makes your home feel instantly more modern. Instead of hunting for adapters or crowding a power strip, you’ll always have a charging spot ready.
The best part? You don’t need to be an electrician to pull this off. As long as you follow the safety basics, this is a DIY upgrade anyone can handle.
So go ahead — grab a USB outlet, shut off the breaker, and see how easy it is to modernize your space.