DIY Book Covers (Step-by-Step Guide to Stylish, Budget-Friendly Protection)
Find out how to make DIY book covers with paper, fabric, or recycled materials. Protect your books while adding personal flair with this simple step-by-step guide.

Introduction
Ever picked up an old favorite only to find its cover torn or faded? You’re not alone. Book covers take the brunt of wear and tear, but replacing them can be costly. Luckily, making your own DIY book covers is both fun and budget-friendly. In this guide, I’ll show you step-by-step how to create protective and stylish covers using simple materials you already have at home.
How to Rebind Paperback Books into Custom Hardcovers | LOTR Project
"Enjoy this curated video. All rights and credit go to the original YouTube creator."
Why Make Your Own Book Covers?
- Protect your books: Prevents dirt, spills, and scratches.
- Showcase creativity: Add personality with fabric, craft paper, or upcycled materials.
- Save money: DIY is far cheaper than store-bought alternatives.
- Eco-friendly: Reuse wrapping paper, newspapers, or old maps.
Materials You’ll Need
- Craft paper, wrapping paper, or fabric
- Scissors
- Ruler and pencil
- Tape or glue stick
- Optional: Stickers, washi tape, stamps, or labels for customization

Step-by-Step Guide
Step 1: Measure the Book
Open the book flat on your paper or fabric. Leave about 2 inches (5 cm) extra on all sides for folding.
Step 2: Cut the Cover Material
Trim the paper or fabric based on your measurement. Accuracy here ensures snug fitting.
Step 3: Fold the Top and Bottom
Fold the excess material along the top and bottom edges to create clean lines. Press firmly.
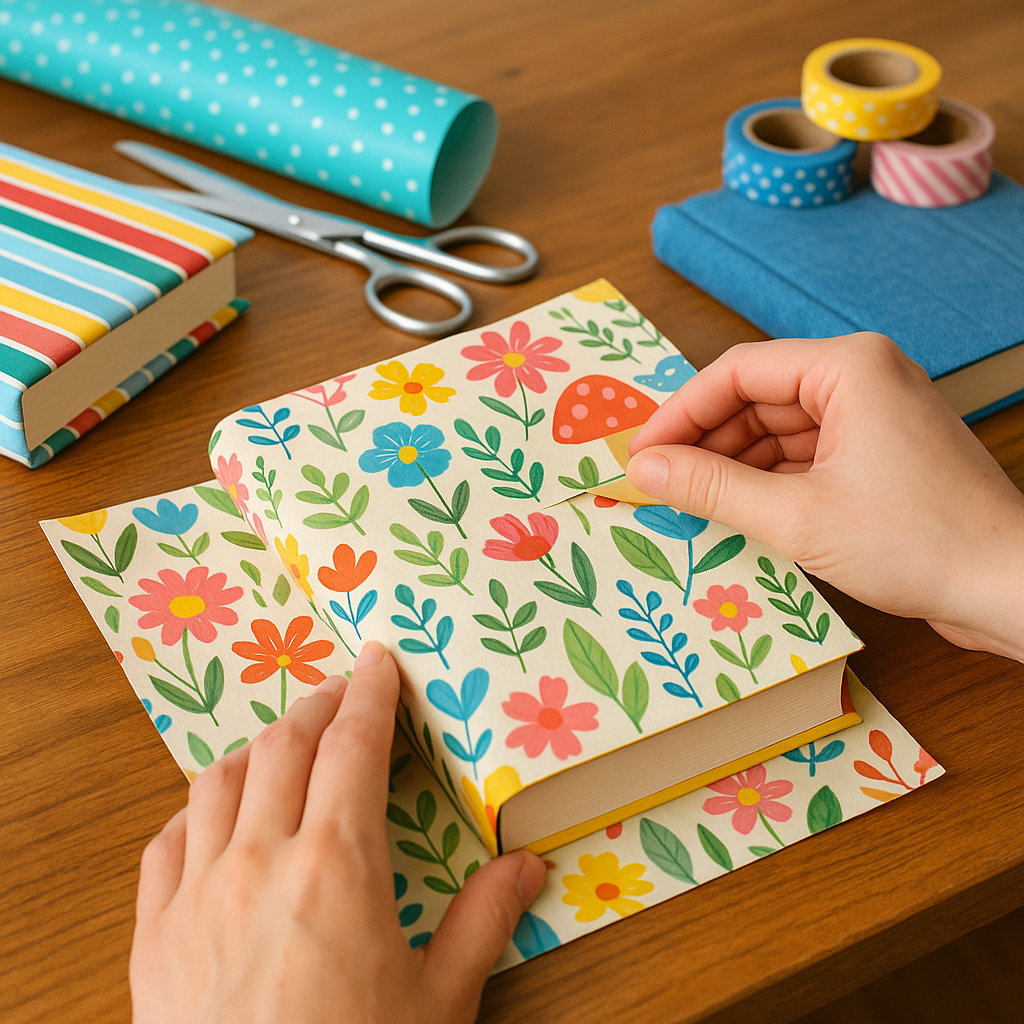
Step 4: Create the Flaps
Fold the left and right edges inward so the book’s front and back covers can slide inside.
Step 5: Slide the Book In
Insert the front cover into the left flap and the back cover into the right flap. Adjust until the book sits neatly.
Step 6: Add Personal Touches
Decorate with stickers, doodles, or washi tape to make each cover unique.

Extra Creative Ideas
- Fabric Covers: Use scrap fabric with spray adhesive for durability.
- Chalkboard Covers: Paint paper with chalkboard paint—great for labeling subjects.
- Upcycled Covers: Repurpose grocery bags, old calendars, or magazine pages.
Common Mistakes to Avoid
- Using thin paper that tears easily.
- Not leaving enough flap space.
- Forgetting to press folds firmly.

Conclusion
Covering your books doesn’t just protect them—it gives you a chance to add personality, style, and even sustainability to your shelf. With a few simple materials like paper, fabric, or even recycled bags, you can create book covers that are both durable and unique. Whether you’re a student looking to protect heavy textbooks, a parent helping kids personalize school supplies, or simply a book lover who values presentation, DIY book covers are a quick win for creativity and care.
The best part? Once you make your first, you’ll realize how easy it is to experiment with different looks. From minimal kraft paper wraps to bold fabric designs, your collection can truly reflect your personality. Protect your pages, save money, and make every book feel special—the DIY way.
DIY Book Covers — Frequently Asked Questions
What’s the best paper for DIY book covers?
Can I use fabric instead of paper?
How do I cover thick textbooks or workbooks?
Will DIY covers damage my books?
Are the covers reusable?
How can I make the cover water-resistant?
What’s the best way to label subjects/spines?
Do the steps differ for hardcovers vs paperbacks?