10 Profitable Woodworking Projects That Sell (Beginner’s Guide)
Turn your hobby into a business! Discover 10 easy woodworking projects that sell. Get simple, step-by-step plans for beginners to make and sell profitable crafts.


Ever walk through a craft fair and think, "I could make that"?
We get it. The idea of turning a pile of lumber into cash is incredibly appealing. But getting started with woodworking can feel overwhelming. You see complex projects and assume you need a massive workshop and years of experience.
The good news? You don't.
We promise to show you 10 simple, beginner-friendly woodworking projects that sell like crazy. These aren't just crafts; they are proven products people actively search for and buy.
In this guide, you’ll discover exactly which projects to build, what tools you'll need, and step-by-step instructions to get you from raw wood to a finished, sellable product.
Let's dive in.
Table of Contents
- Why Woodworking is a Great Side Hustle
- Essential Tools and Materials for Beginners
- Important Safety Precautions
- Project 1: Rustic Wooden Coasters
- Project 2: Classic Cutting Boards
- Project 3: Charming Bathtub Caddies
- Project 4: Simple Floating Shelves
- Project 5: Modern Phone Stands
- Project 6: Farmhouse-Style Wooden Crates
- Project 7: Minimalist Plant Stands
- Project 8: Custom Engraved Keychains
- Project 9: Wooden Serving Trays
- Project 10: Tablet and Cookbook Holders
- Next Steps: Start Building Your Business
Why Woodworking is a Great Side Hustle
Before we grab the sandpaper, let's talk about why this is such a powerful opportunity.
Handmade wooden goods have a timeless appeal. In a world of mass-produced plastic, people crave authentic, high-quality items.
Here’s why a woodworking side hustle works:
- Low Startup Costs: You don’t need a $10,000 workshop. You can start with a few essential hand tools and a small workspace.
- High Profit Margins: The cost of raw wood is relatively low compared to the prices you can command for finished, beautiful products.
- Scalability: Start by selling on platforms like Etsy or at local markets. As you grow, you can expand your product line and even create your own brand.
- Creative Fulfillment: It’s not just about the money. Turning raw materials into something beautiful and functional with your own hands is incredibly rewarding.
This isn't just a hobby; it's a legitimate path to starting a small business from your garage or spare room. Get the best deals for all your woodworking projects.
Essential Tools and Materials for Beginners
You can accumulate tools over time. To start, you only need the basics. Focus on quality over quantity.
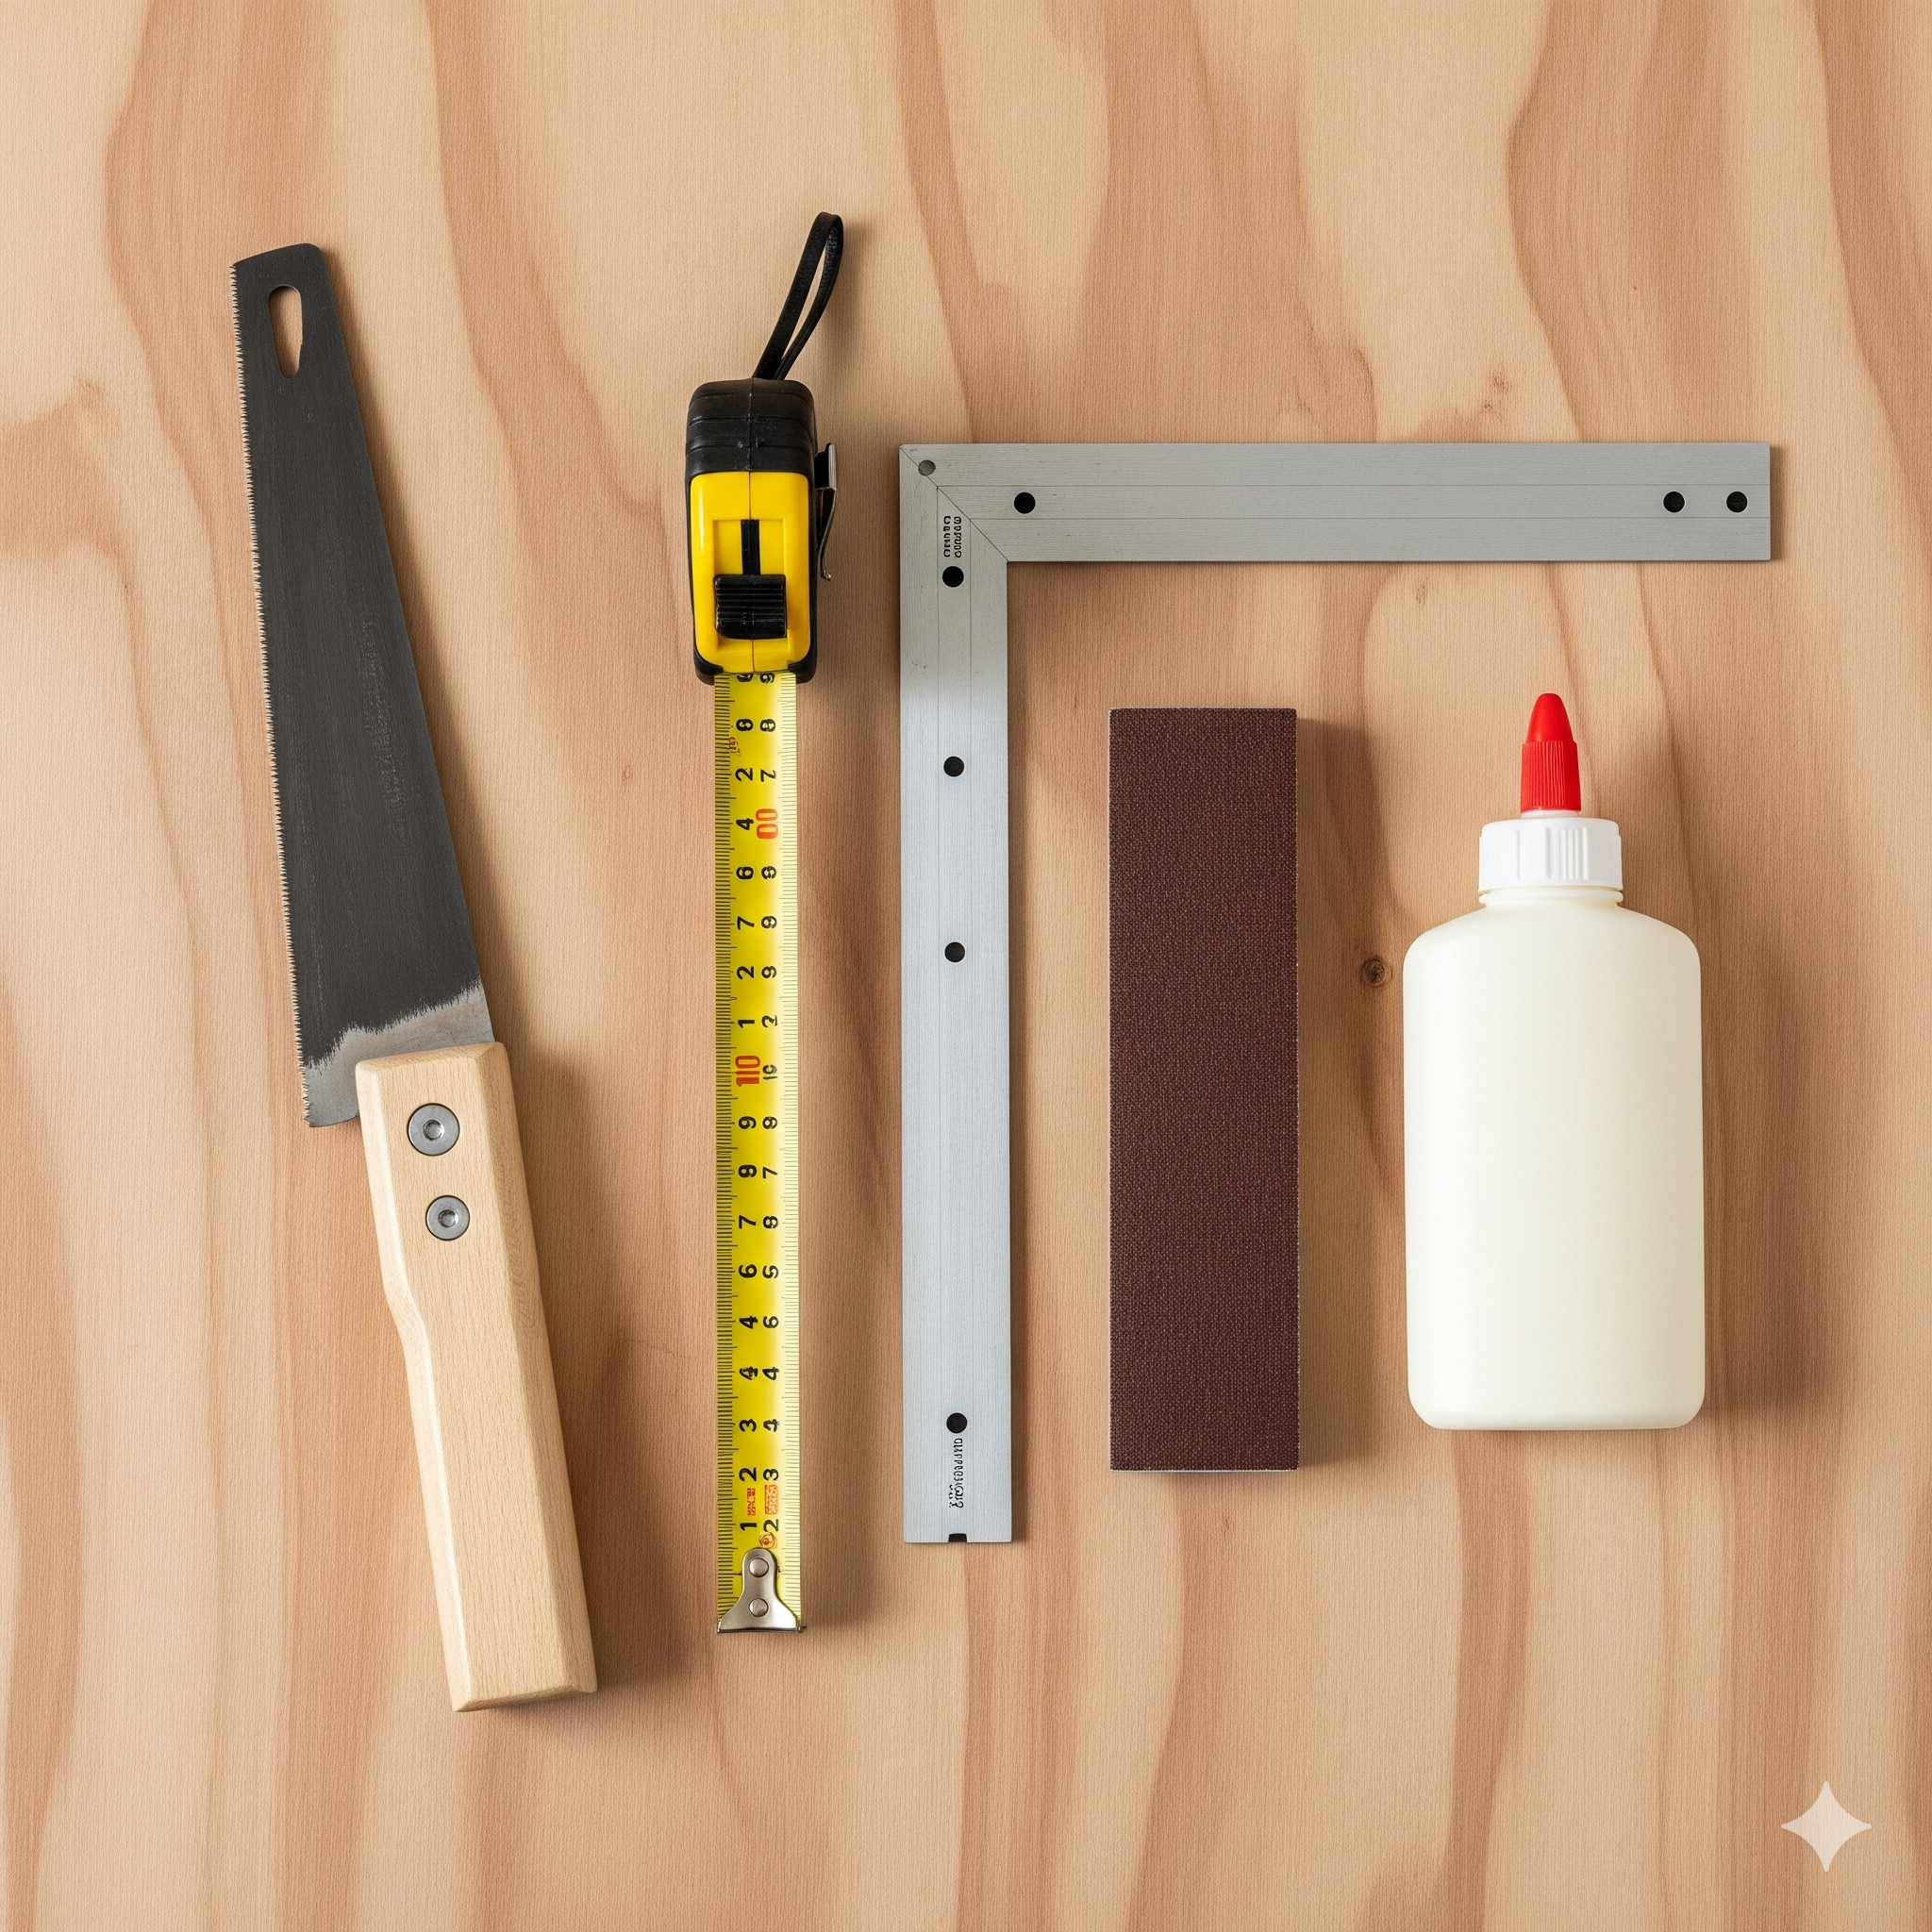
Essential Tools:
- Measuring & Marking: Tape Measure, Carpenter's Square, Pencil
- Cutting: A good Hand Saw (like a Japanese Pull Saw) or a Miter Saw for faster, more accurate cuts.
- Smoothing: Sandpaper (various grits: 80, 120, 220), Sanding Block or an Orbital Sander.
- Joining: Wood Glue (Titebond II is a great choice), Clamps (you can never have too many).
- Safety: Safety Glasses, Dust Mask, Hearing Protection.
Recommended Materials for Getting Started
To ensure your first projects are successful and cost-effective, it's best to start with woods that are easy to work with. As your skills advance, you can move on to premium hardwoods to create higher-value items.
Beginner-Friendly Woods
- Pine: A widely available and affordable softwood, making it perfect for practicing techniques and creating projects with a rustic charm.
- Poplar: A versatile and relatively inexpensive hardwood that's easy to cut and sand, and it takes paint exceptionally well.
- Aspen: A light-colored hardwood with a fine, straight grain that's soft and easy to shape, providing a clean, modern look.
Intermediate & Premium Woods
- Oak: A strong, durable, and classic hardwood with a prominent grain, ideal for sturdy projects like shelves and trays.
- Maple: A hard and dense wood with a subtle grain, making it an excellent choice for durable items that see a lot of use, such as cutting boards.
- Walnut: A premium hardwood known for its rich, dark color and beautiful grain patterns, perfect for creating high-end, elegant pieces.
Essential Finishes
- Wood Finishes: It's crucial to select a finish to protect your work. Common options include mineral oil for food-safe items or polyurethane for projects requiring maximum durability against moisture and wear.
Ready to build something amazing? Your next woodworking project starts with incredible savings at Walmart. Find the best deals on top-brand tools, quality lumber, and all the supplies you need to bring your ideas to life. Get everything for your workshop and save big today!
Important Safety Precautions
Safety is non-negotiable. Woodworking tools are powerful and demand respect.
- Always Wear Your PPE: Safety glasses are a MUST. A dust mask is critical to protect your lungs from fine sawdust.
- Read the Manual: Understand how your power tools work before you plug them in.
- Keep a Clean Workspace: A cluttered floor is a tripping hazard. Sawdust can be slippery.
- Never Work When Tired or Distracted: Mistakes happen when you lose focus.
- Secure Your Work: Use clamps to hold your wood firmly in place before cutting, drilling, or sanding.
Safety Warning: Power Tool Respect
Always keep your fingers away from the path of any blade. Unplug tools before changing blades or making adjustments. Treat every tool as if it's on, even when it's not.
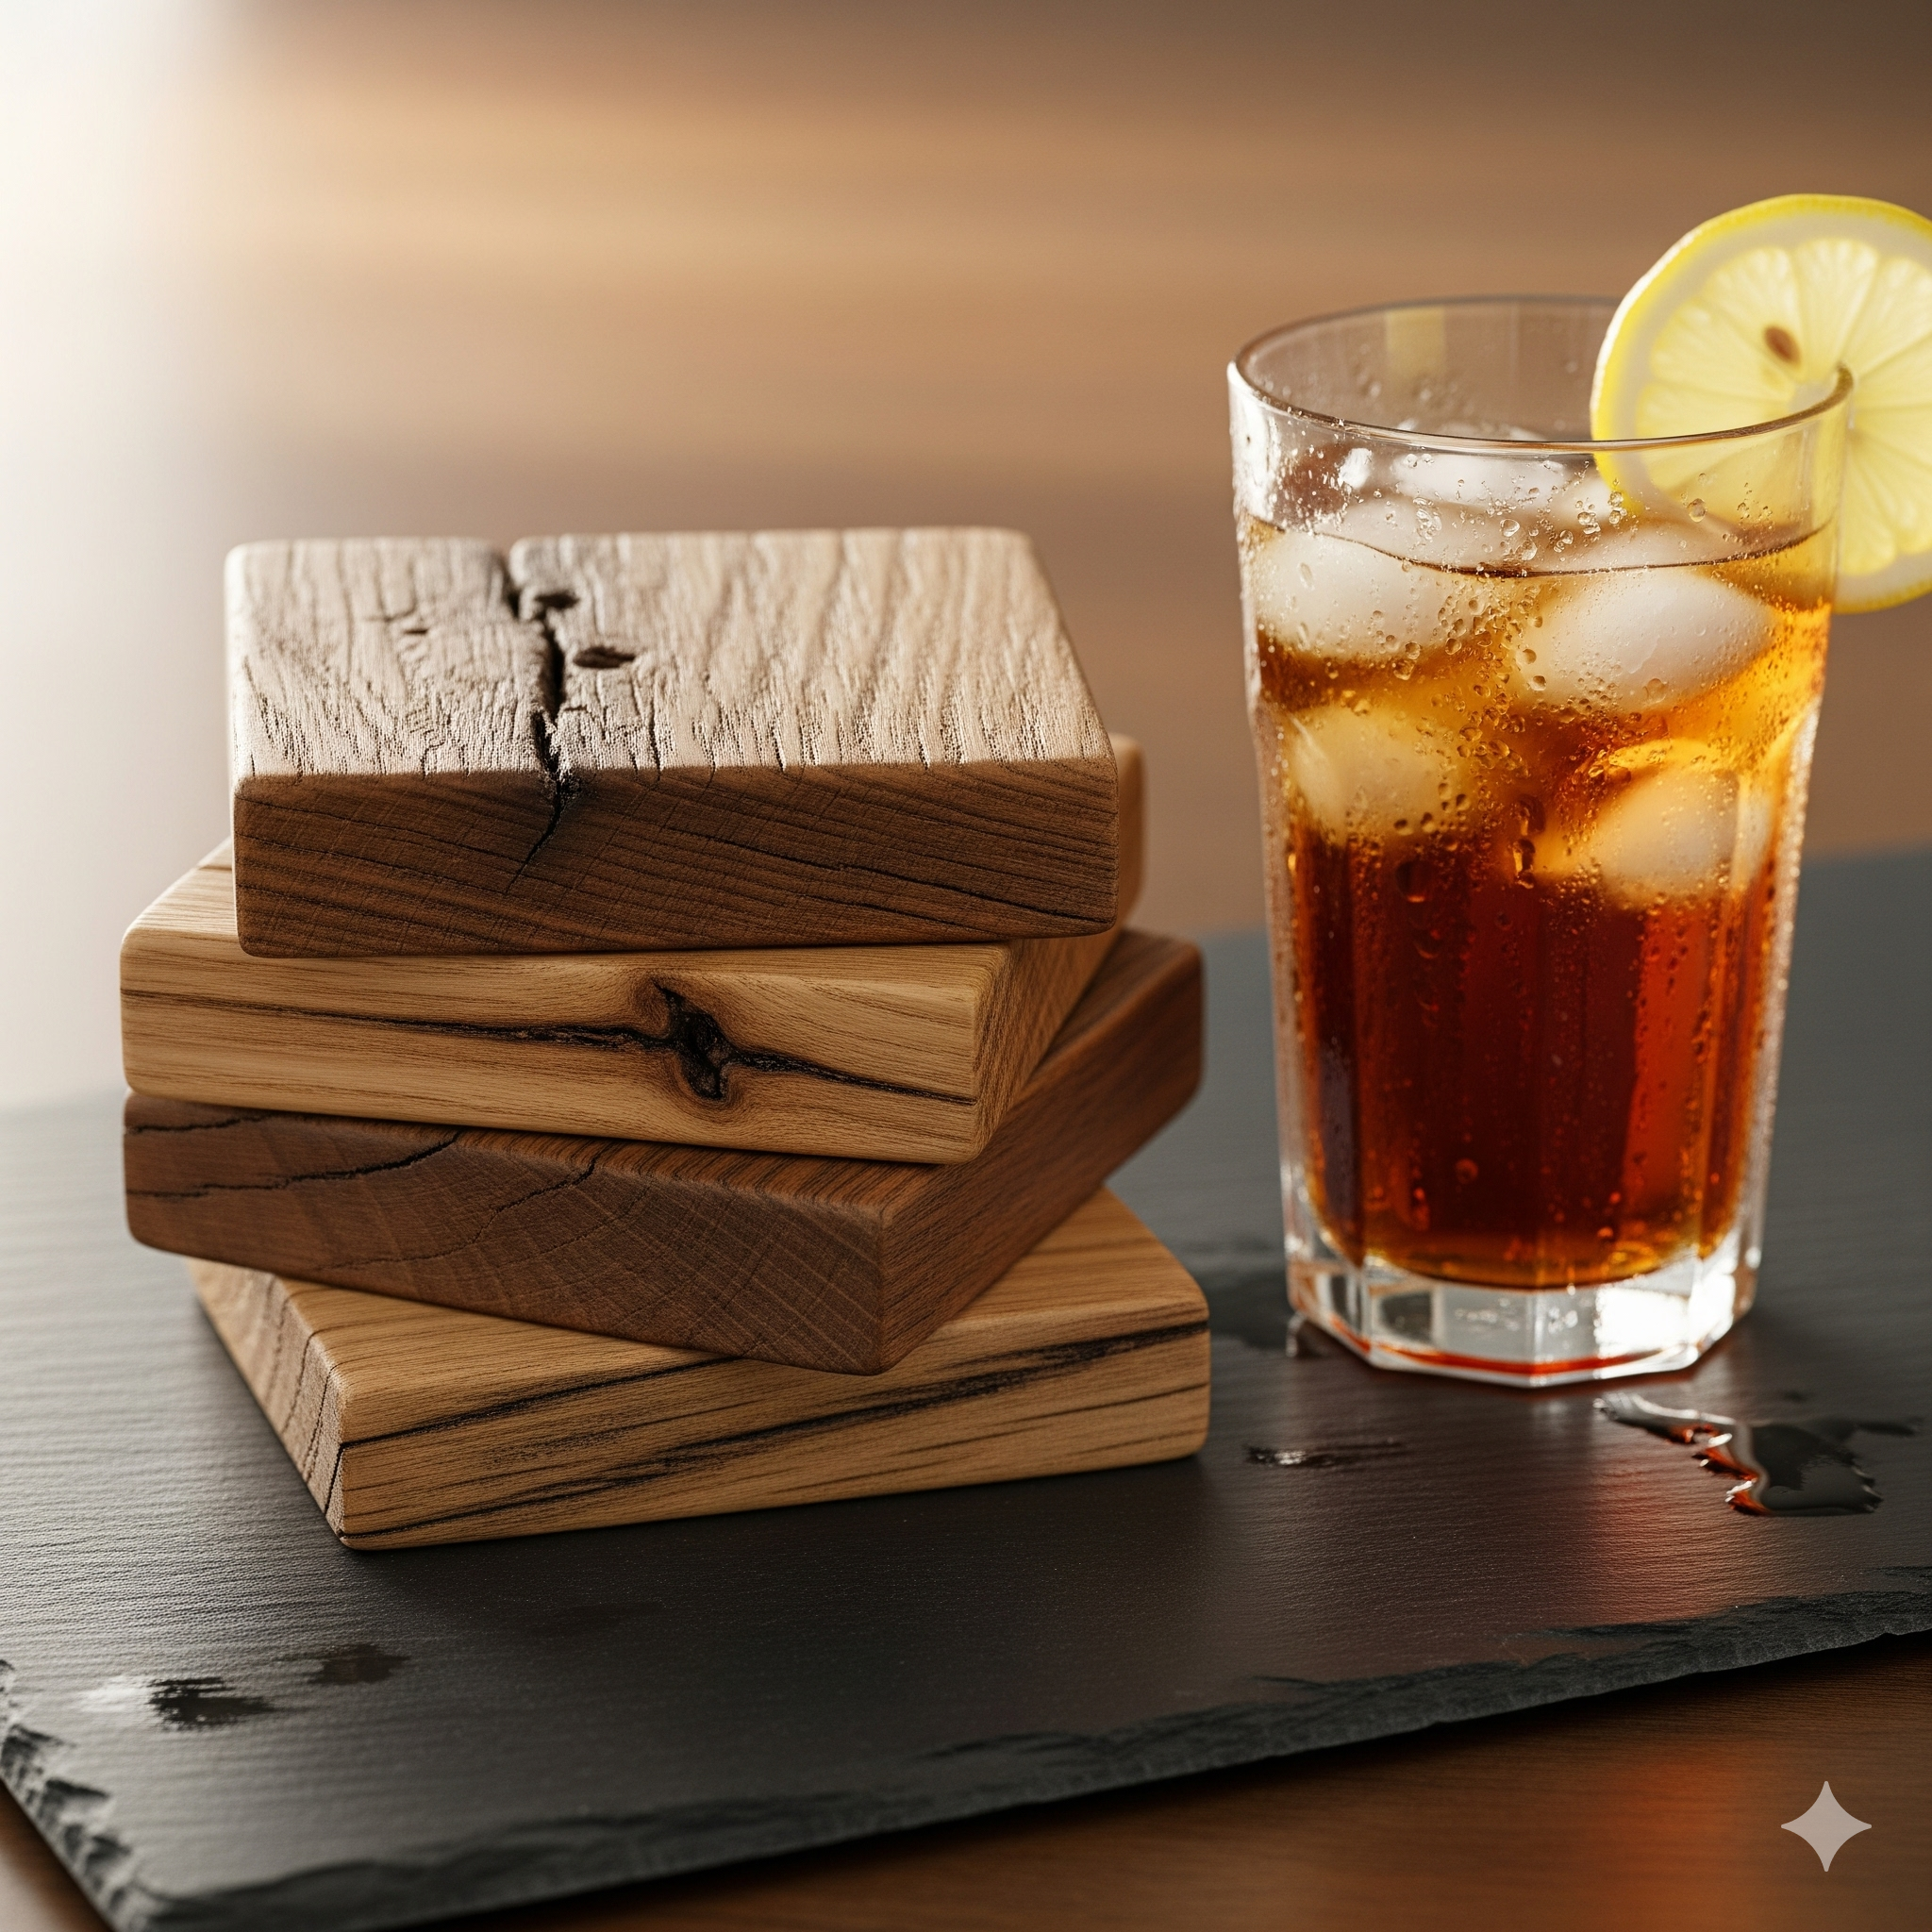
Project 1: Rustic Wooden Coasters
Why they sell: Coasters are an impulse buy and a perfect gift. They’re small, easy to ship, and can be customized endlessly. Sets of 4 or 6 sell best.
- Materials: A 4x4" wood post or a 1x4" board, sandpaper, wood finish (like polyurethane or shellac).
- Steps:
- Cut: Measure and cut your 4x4" post into ½" thick slices. If using a 1x4" board, cut it into 3.5" long pieces to create squares.
- Sand: Sand every surface of each coaster until smooth. Start with 80-grit, move to 120-grit, and finish with 220-grit for a super-smooth feel.
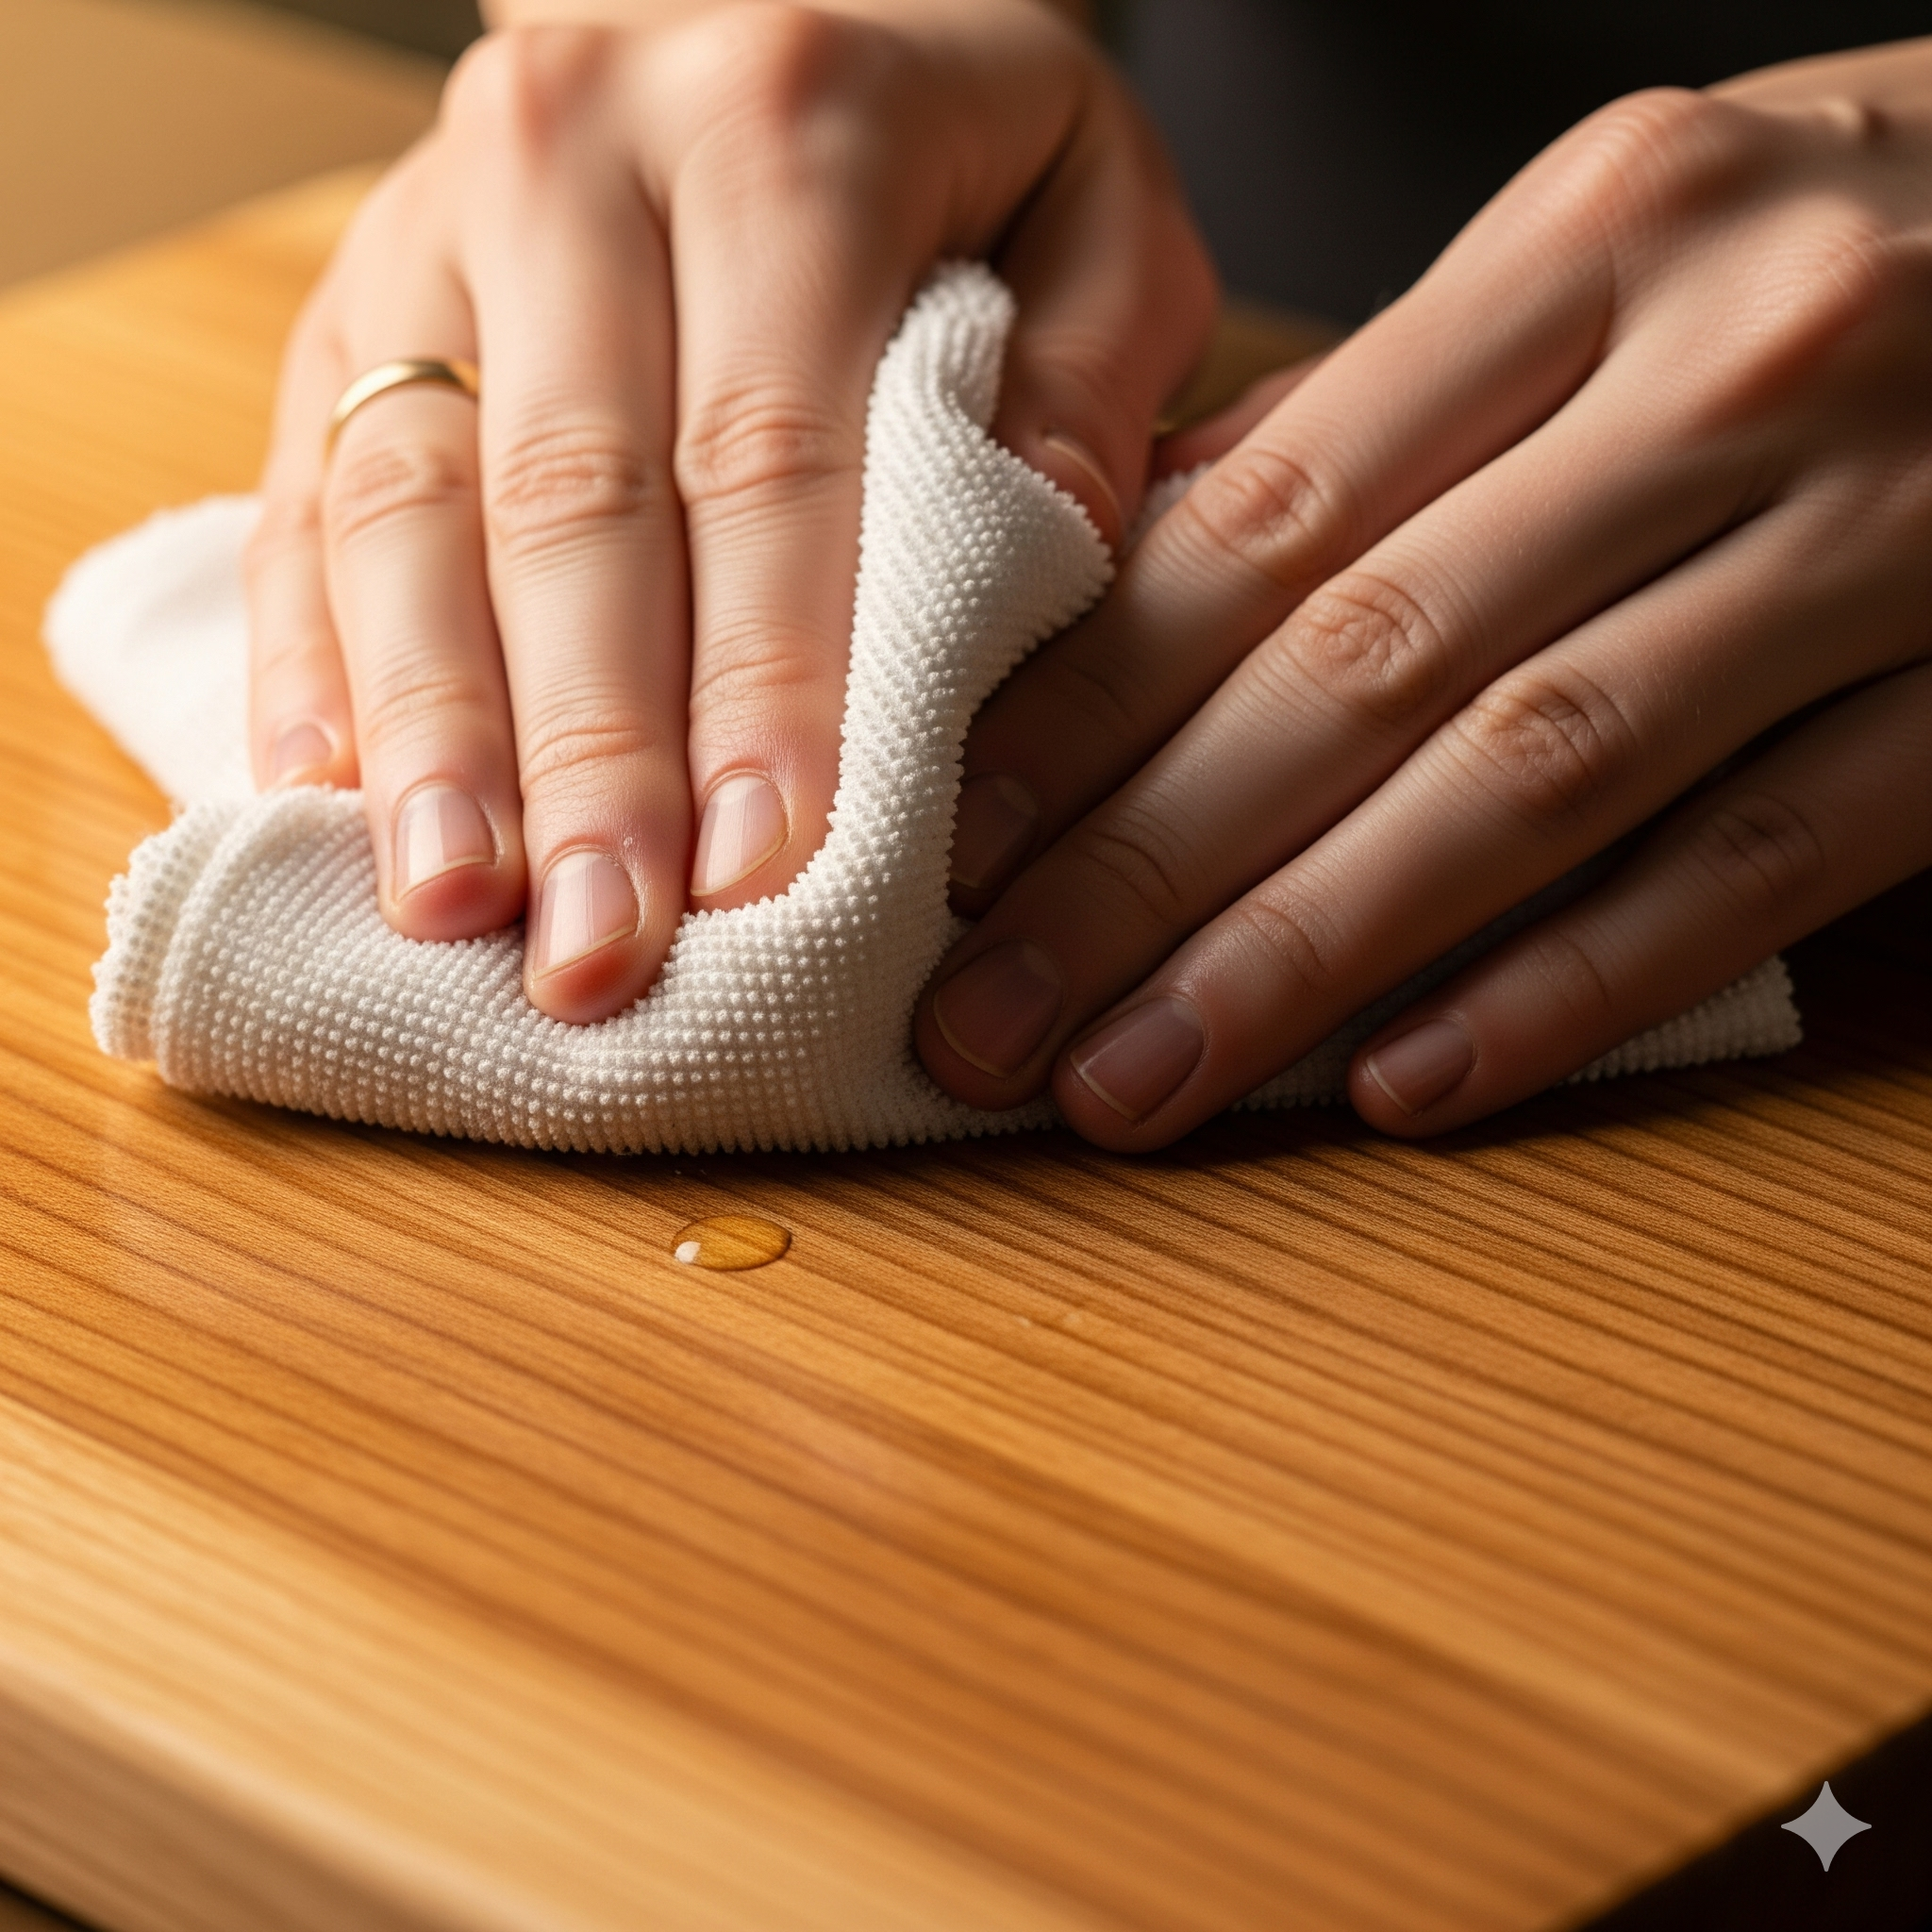
- Finish: Apply 2-3 coats of a waterproof finish, sanding lightly between coats. This is crucial to protect them from drink condensation.
- Pro-Tip for Selling: Bundle them in sets of four and tie them with twine or a branded ribbon. Offer custom laser engraving for a premium price.
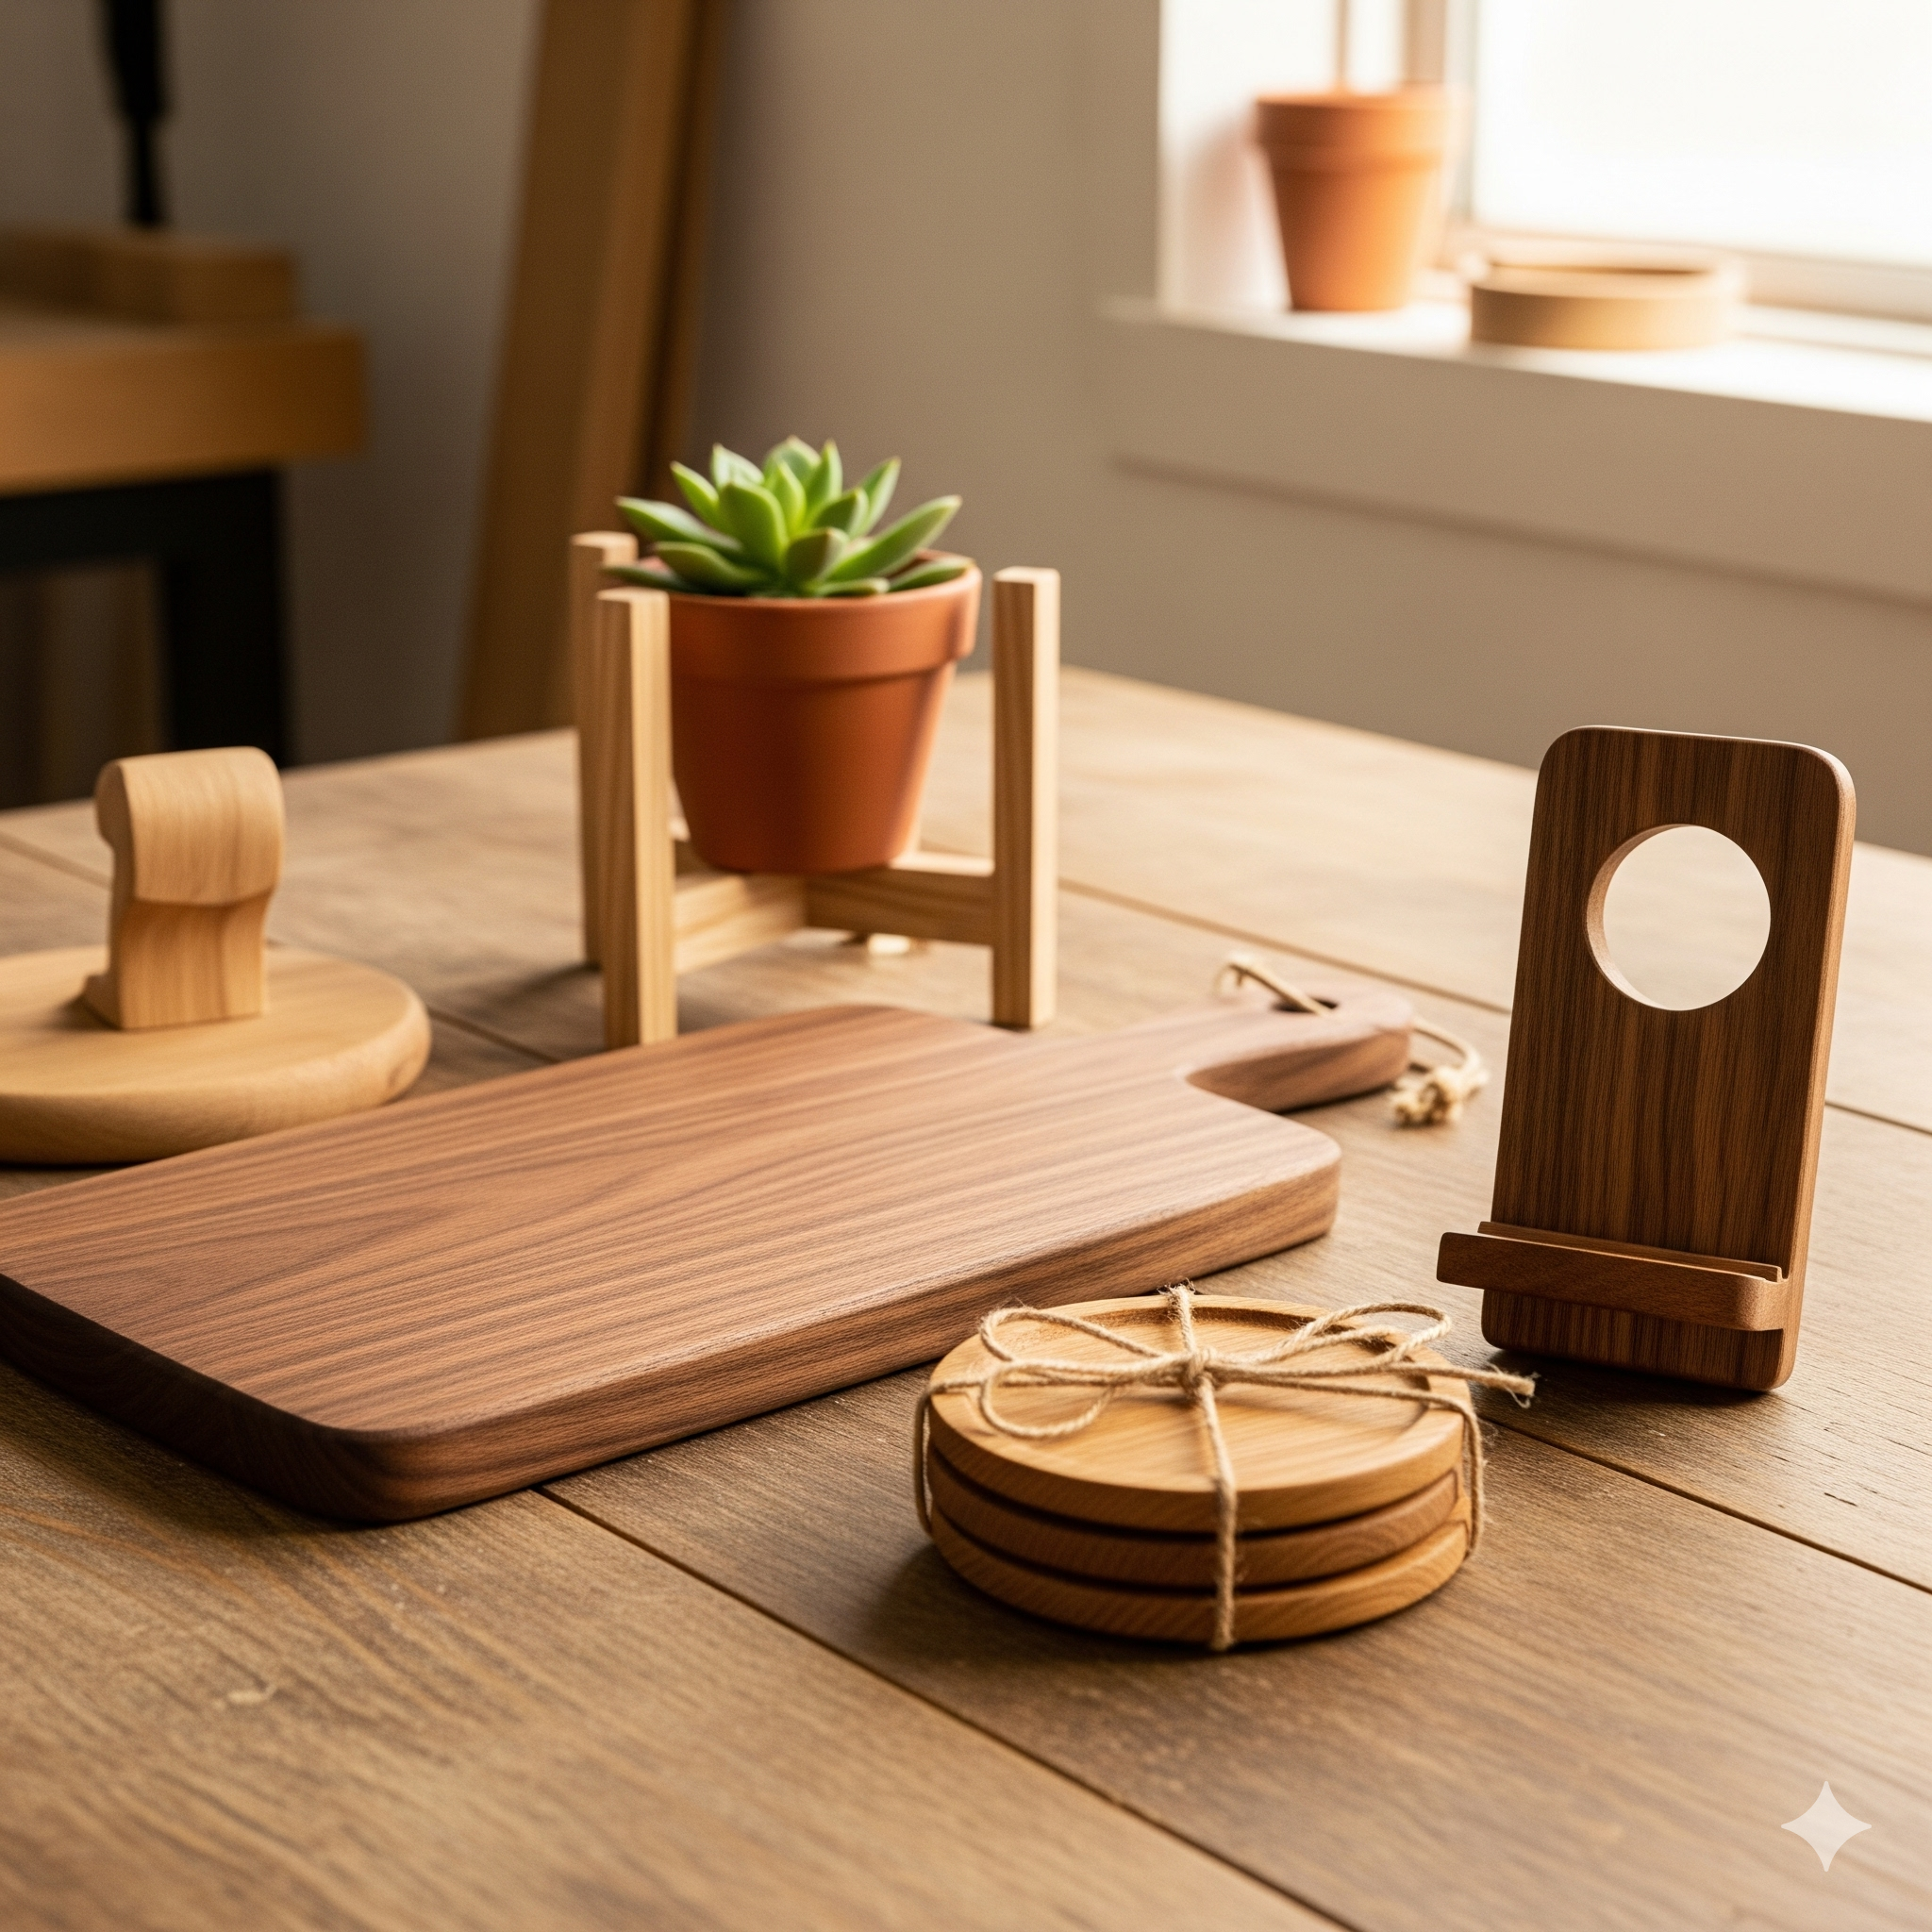
Project 2: Classic Cutting Boards
Why they sell: A high-quality wooden cutting board is a staple in every kitchen. They are functional, beautiful, and make fantastic housewarming or wedding gifts.
- Materials: A piece of hardwood (Maple, Walnut, or Cherry are excellent choices), sandpaper, food-safe mineral oil, and wood conditioner.
- Steps:
- Select & Cut: Choose a 1" thick board. Cut it to your desired size (e.g., 9"x12" or 12"x18"). Ensure your corners are square.
- Shape (Optional): Use a router or sandpaper to round over the edges for a more professional look and comfortable feel. You can also drill a hole in one corner for hanging.
- Sand Thoroughly: This is key. Sand all surfaces up to at least 220-grit. The board should feel silky smooth.
- Finish: Liberally apply food-safe mineral oil. Let it soak in for 20 minutes, then wipe off the excess. Repeat this process 2-3 times.
- Pro-Tip for Selling: Create a "care kit" that includes a small bottle of mineral oil and instructions. This adds huge perceived value.
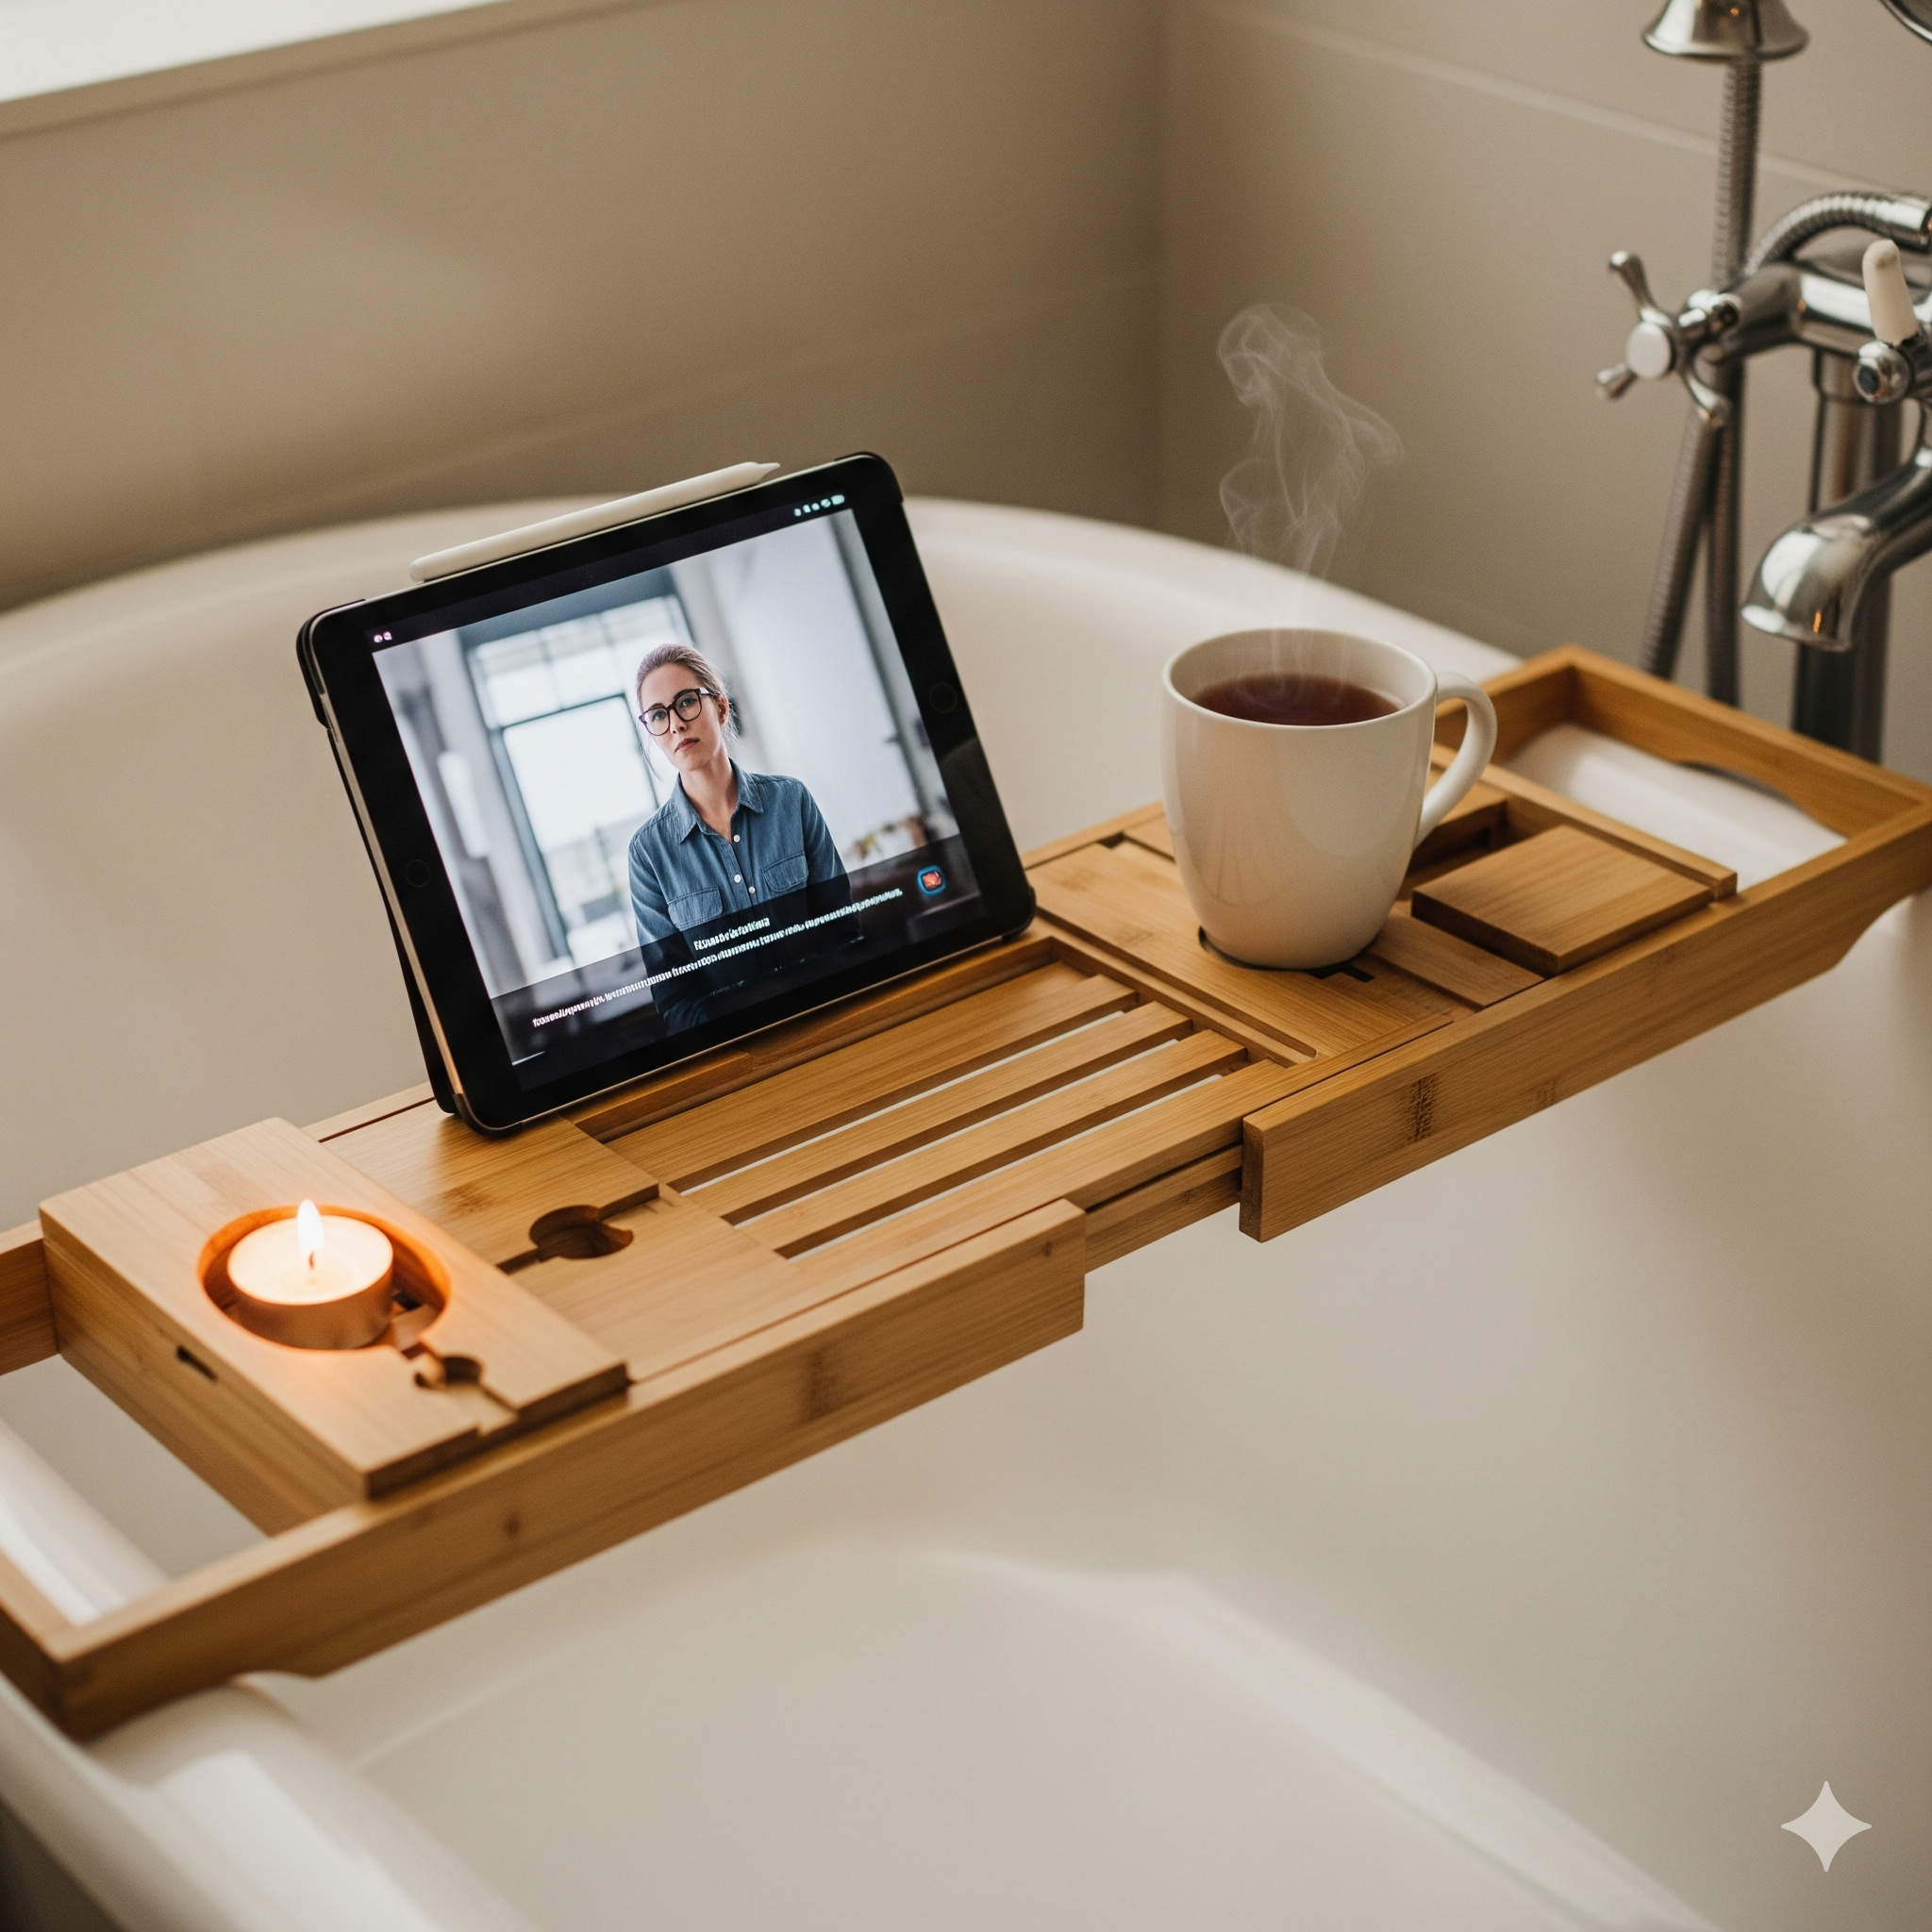
Project 3: Charming Bathtub Caddies
Why they sell: The self-care market is huge. A bathtub caddy that can hold a book, a tablet, and a glass of wine is a luxury item that people love to buy for themselves or as a gift.
- Materials: One 1x10" board (Pine or Cedar works well), two 1x2" strips for the bottom, wood glue, waterproof finish (spar urethane is great).
- Steps:
- Measure: Measure the width of a standard bathtub (usually around 30"). Cut your 1x10" board to be about 2-3 inches wider than the tub.
- Attach Cleats: Cut two small pieces from the 1x2" strip, slightly shorter than the width of your caddy. Glue and screw them to the bottom of the caddy, positioned so they will rest just inside the tub walls to prevent the caddy from sliding off.
- Customize: Cut a slot for a tablet or a circle for a wine glass holder.
- Sand and Finish: Sand everything smooth and apply at least three coats of a high-quality waterproof finish.
- Pro-Tip for Selling: Stage photos with a book, a wine glass, and some candles to sell the experience, not just the product.
Project 4: Simple Floating Shelves
Why they sell: Floating shelves are a modern, minimalist home decor trend that isn't going away. They are versatile and can be used in any room of the house.
- Materials: 2x6" or 2x8" construction-grade lumber (like Douglas Fir), sandpaper, stain or paint, floating shelf hardware.
- Steps:
- Cut: Cut the board to your desired length (e.g., 24", 36").
- Prep: Sand the board smooth. You can distress the wood with a hammer or chains for a rustic look if desired.
- Finish: Apply your choice of stain or paint. Follow up with a protective topcoat like polyurethane.
- Install Hardware: Drill holes in the back of the shelf to accommodate the floating shelf brackets. Ensure they are level. For an in-depth guide, check out our post on <a href="/how-to-install-floating-shelves">How to Install Floating Shelves Perfectly Level</a>.
- Pro-Tip for Selling: Sell them in sets of two or three. Offer different lengths and a variety of stain colors to match different decor styles.

Project 5: Modern Phone Stands
Why they sell: Everyone has a smartphone. A simple, elegant wooden stand is a perfect desk accessory for home or office. This is one of the best small wood projects that sell.
- Materials: A small block of wood (e.g., a 4x4" post cut to 4" long), or a 1x4" board, sandpaper, finish.
- Steps:
- Cut Angles: On a block of wood, use a miter saw or hand saw with a miter box to cut an angle (around 15-20 degrees) on the top. This will be the resting surface for the phone.
- Cut the Slot: Make a cut about ½" deep near the front to create a lip that holds the phone in place.
- Add a Charging Notch: Carve or drill a small notch at the bottom of the slot to allow a charging cable to pass through.
- Sand & Finish: Sand all edges smooth and apply a finish like Danish oil or wax for a natural feel.
- Pro-Tip for Selling: Market these as "desk organizers" or "charging docks." Offer them in different wood types like walnut for a premium look or bamboo for an eco-friendly vibe.
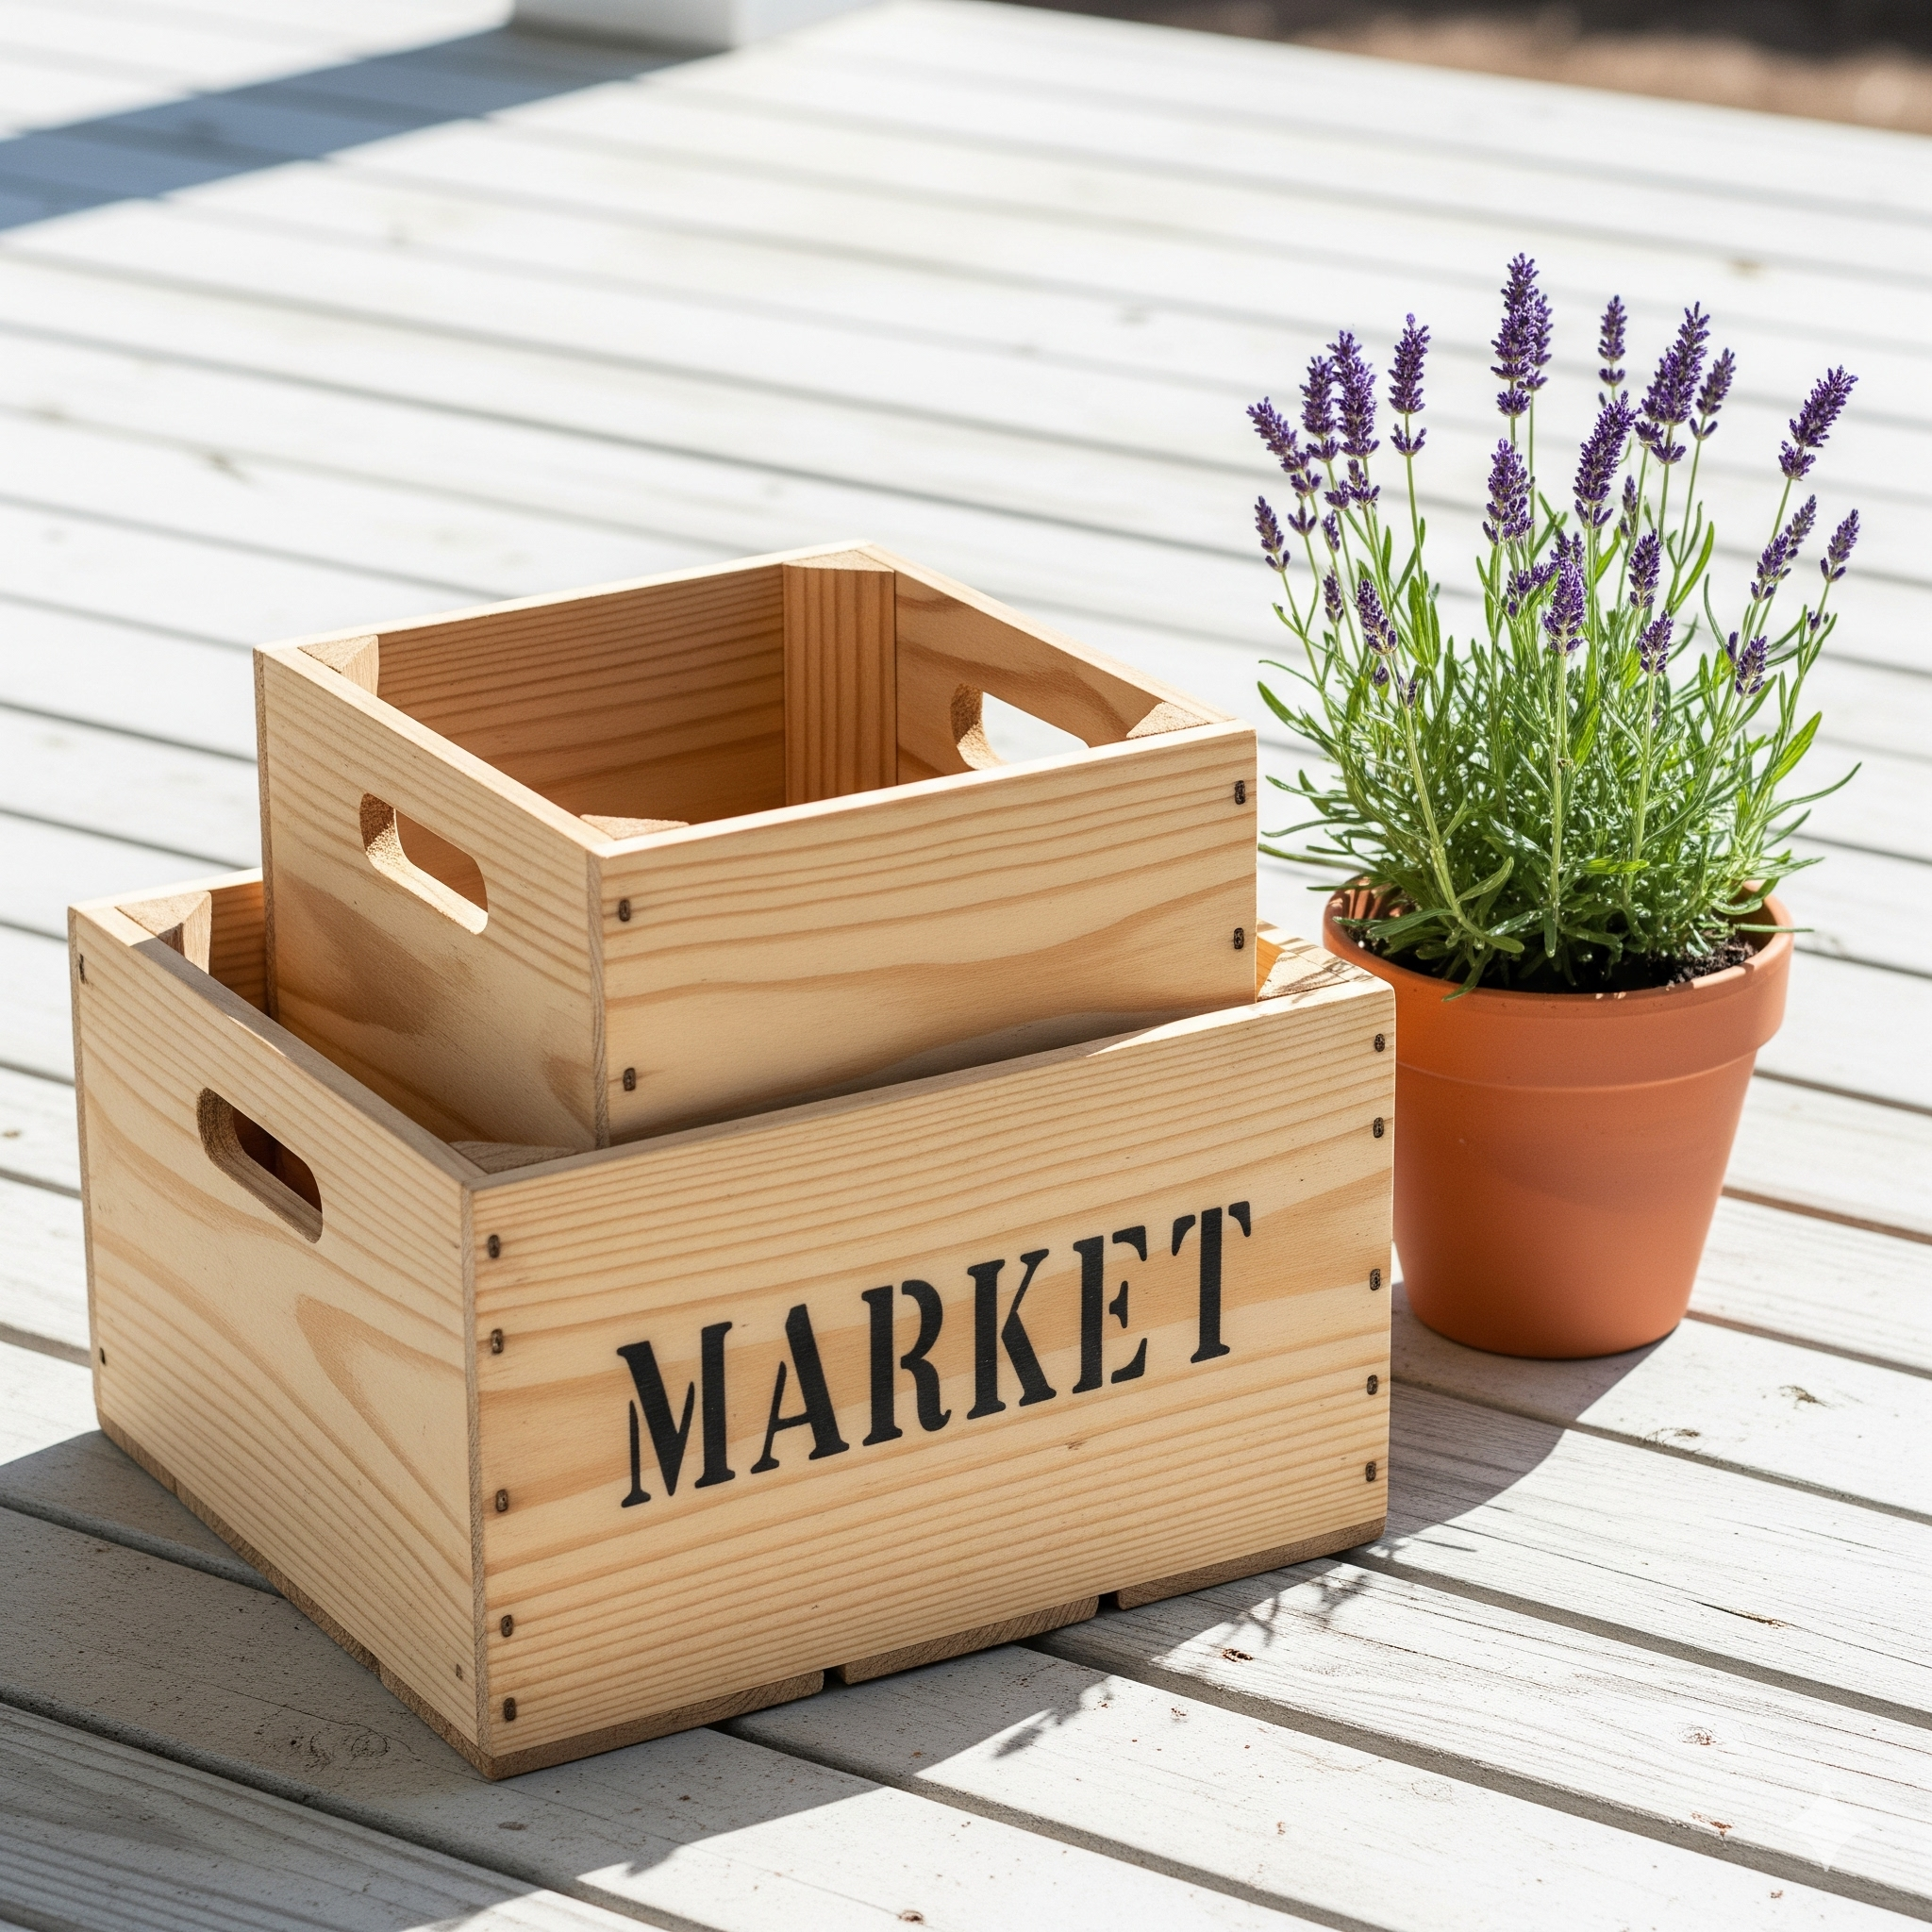
Project 6: Farmhouse-Style Wooden Crates
Why they sell: Farmhouse decor is incredibly popular. These crates are versatile—used for storage, decoration, or as gift baskets.
- Materials: Several 1x4" boards, 1" brad nails, wood glue, stain.
- Steps:
- Cut Pieces: Cut four pieces for the long sides, four for the short sides (ends), and two or three for the bottom.
- Assemble the Ends: Take two short side pieces and attach two vertical pieces on the inside to form the end panels.
- Connect the Sides: Glue and nail the long side pieces to the completed end panels.
- Attach Bottom: Flip the crate over and attach the bottom slats, leaving small gaps between them for a classic crate look.
- Finish: Sand any rough spots and apply a rustic stain.
- Pro-Tip for Selling: Stencil words like "FARMER'S MARKET," "PANTRY," or "TOYS" on the side. Sell them as decor or functional storage.
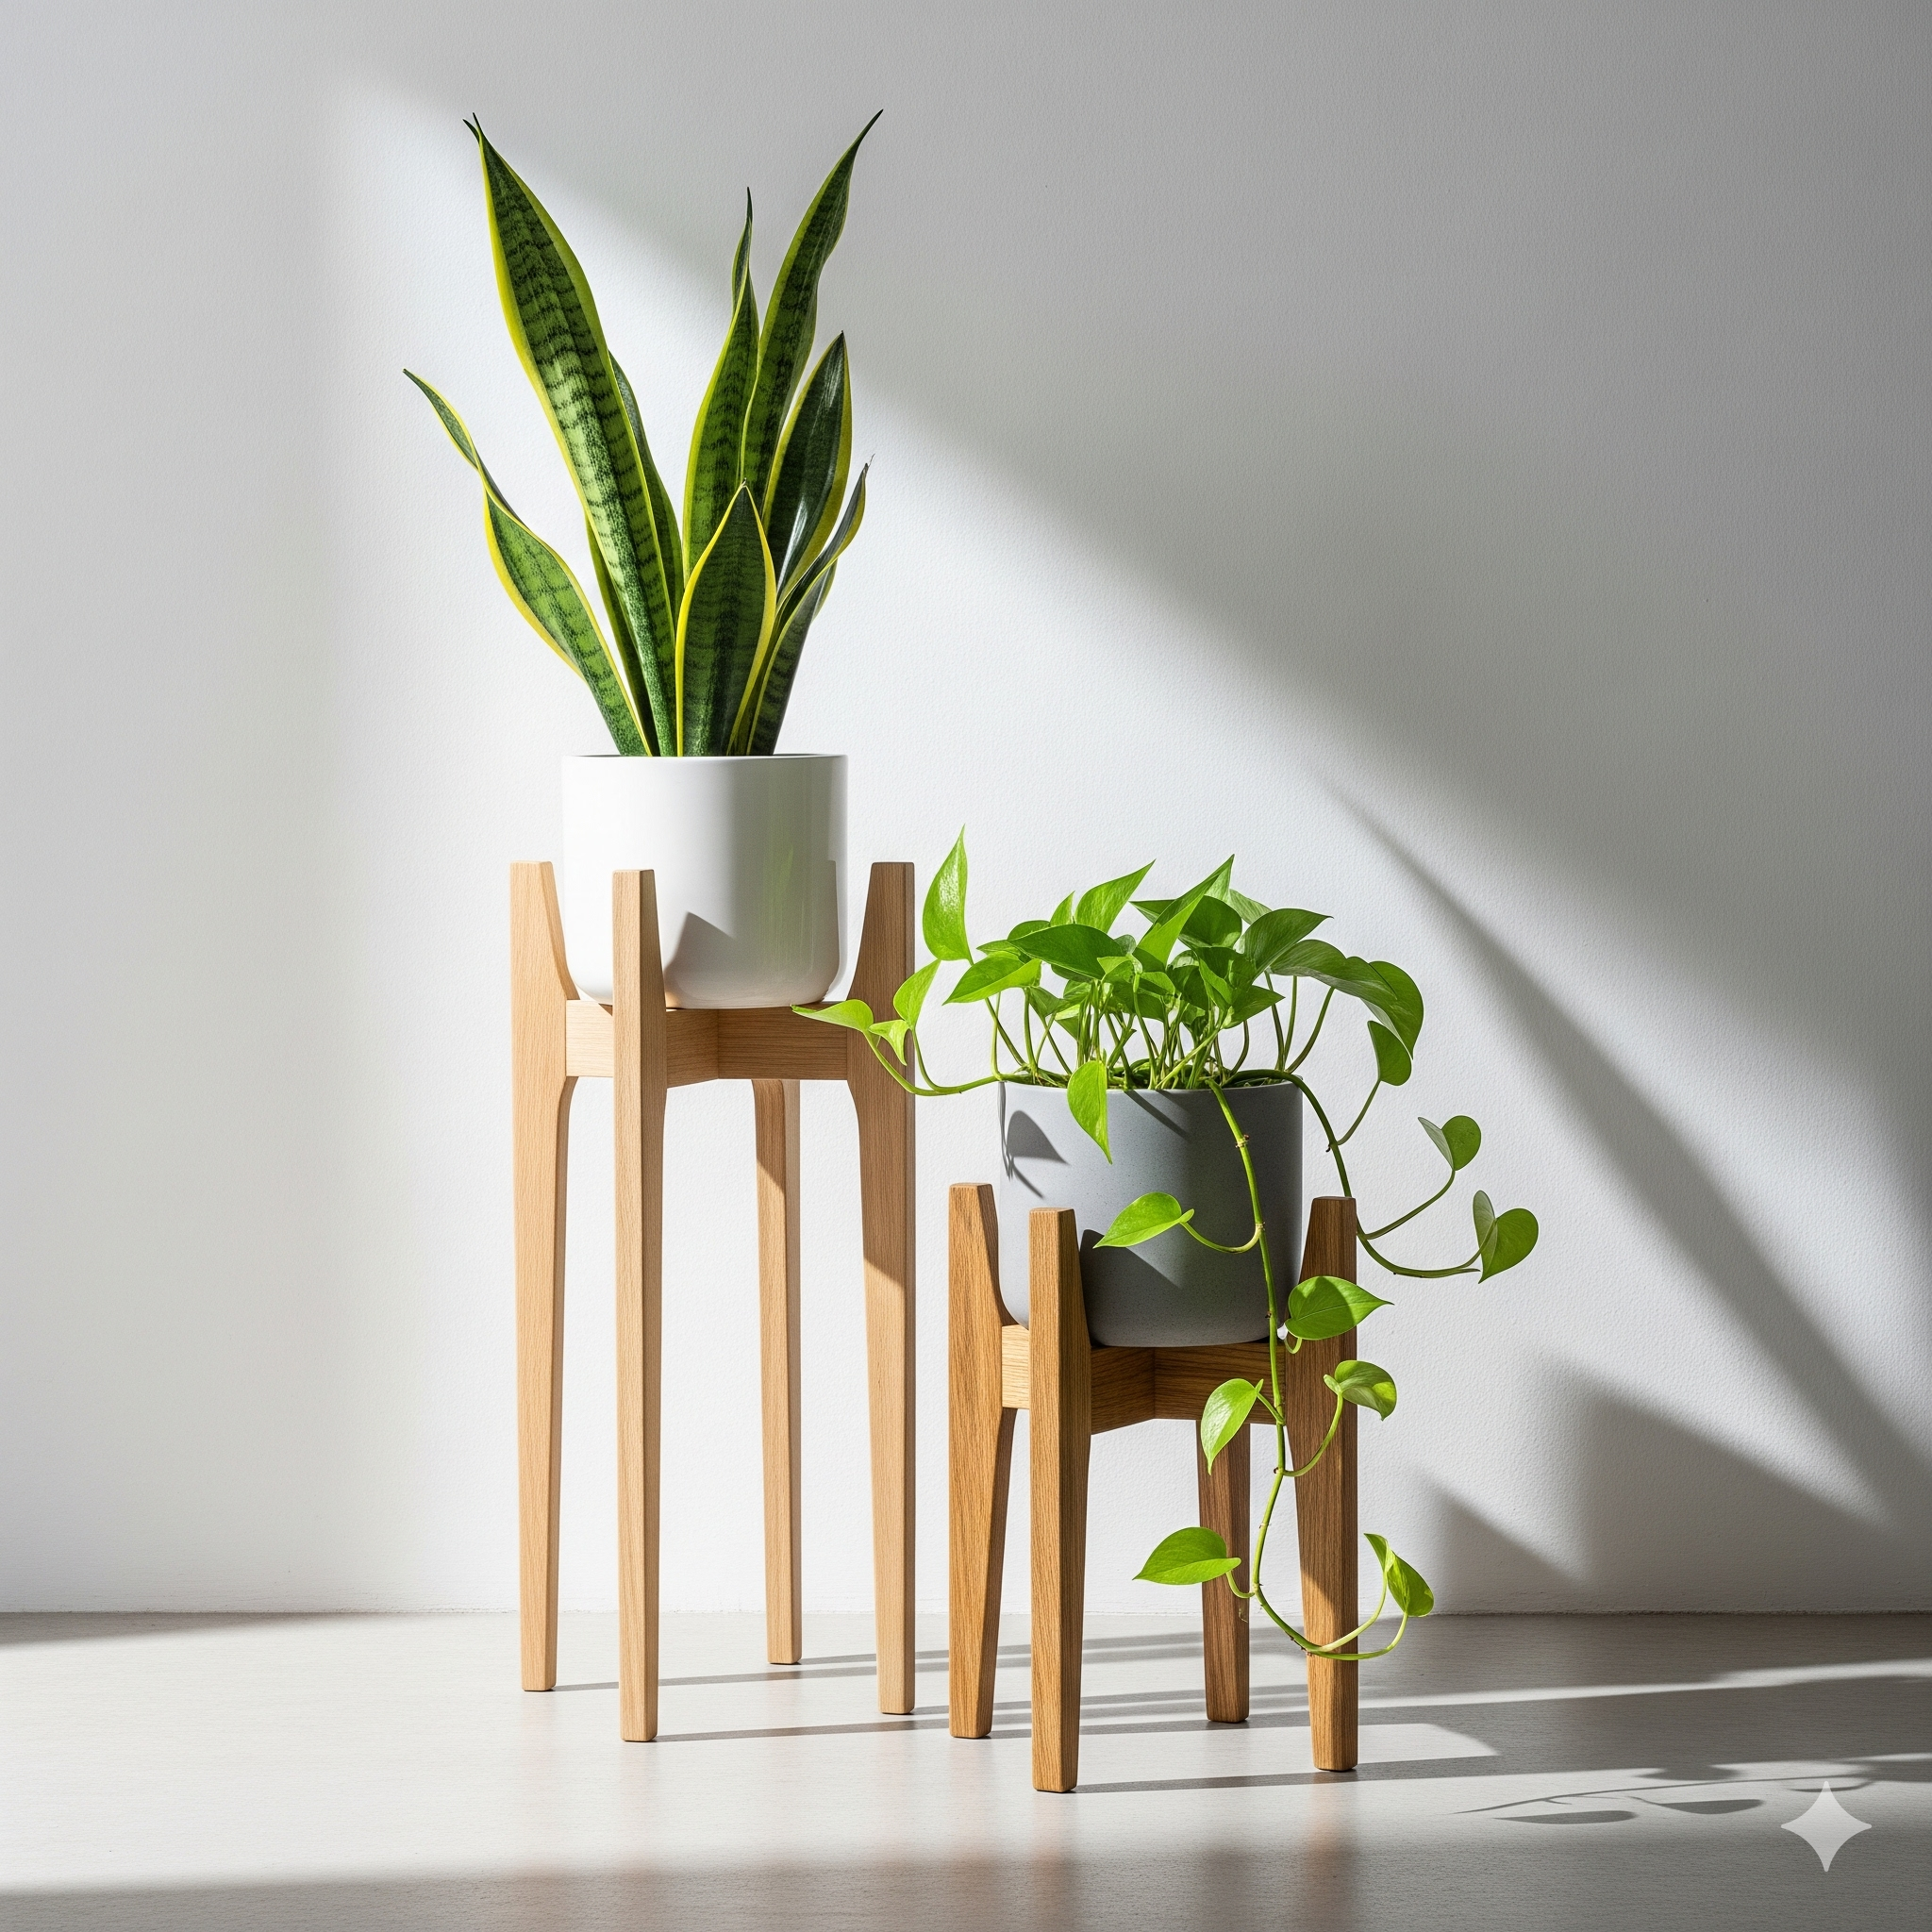
Project 7: Minimalist Plant Stands
Why they sell: Houseplants are a massive trend. Stylish plant stands elevate the look of a simple pot and are highly sought after by plant lovers.
- Materials: 1x2" hardwood dowels or square stock (oak or poplar), wood glue, a single wood screw.
- Steps:
- Cut Legs: Cut four legs to the same length (e.g., 12").
- Create Cross-Braces: Cut two shorter pieces that will form the "X" where the pot sits.
- Notch the Braces: Find the center of each cross-brace and cut a notch halfway through the wood. The notches should allow the two pieces to interlock snugly, forming a flat "X".
- Assemble: Glue the "X" together. Then, attach the four legs to the ends of the cross-braces using wood glue and possibly a screw from the top for extra strength.
- Finish: Apply a clear coat or a stain to protect the wood from water.
- Pro-Tip for Selling: Sell these in different heights (e.g., 8", 12", 16") as a set. Show them with popular houseplants in your product photos.

Project 8: Custom Engraved Keychains
Why they sell: Keychains are the ultimate small, personalized gift. They are cheap to make, easy to ship, and the customization options are limitless.
- Materials: Thin wood scraps or small craft wood pieces (like ½" thick), keychain hardware, sandpaper, finish.
- Steps:
- Shape: Cut the wood into small, interesting shapes—circles, rectangles, hexagons.
- Drill: Drill a small hole for the keychain ring.
- Sand: Sand all edges until they are perfectly smooth and comfortable to hold.
- Personalize: This is the key. Use a wood-burning tool or a small laser engraver (many affordable hobbyist models are available) to add initials, names, or simple designs.
- Finish & Assemble: Apply a durable finish and attach the keychain hardware.
- Pro-Tip for Selling: Offer custom orders. Market them as wedding favors, real estate closing gifts, or personalized "new driver" gifts.
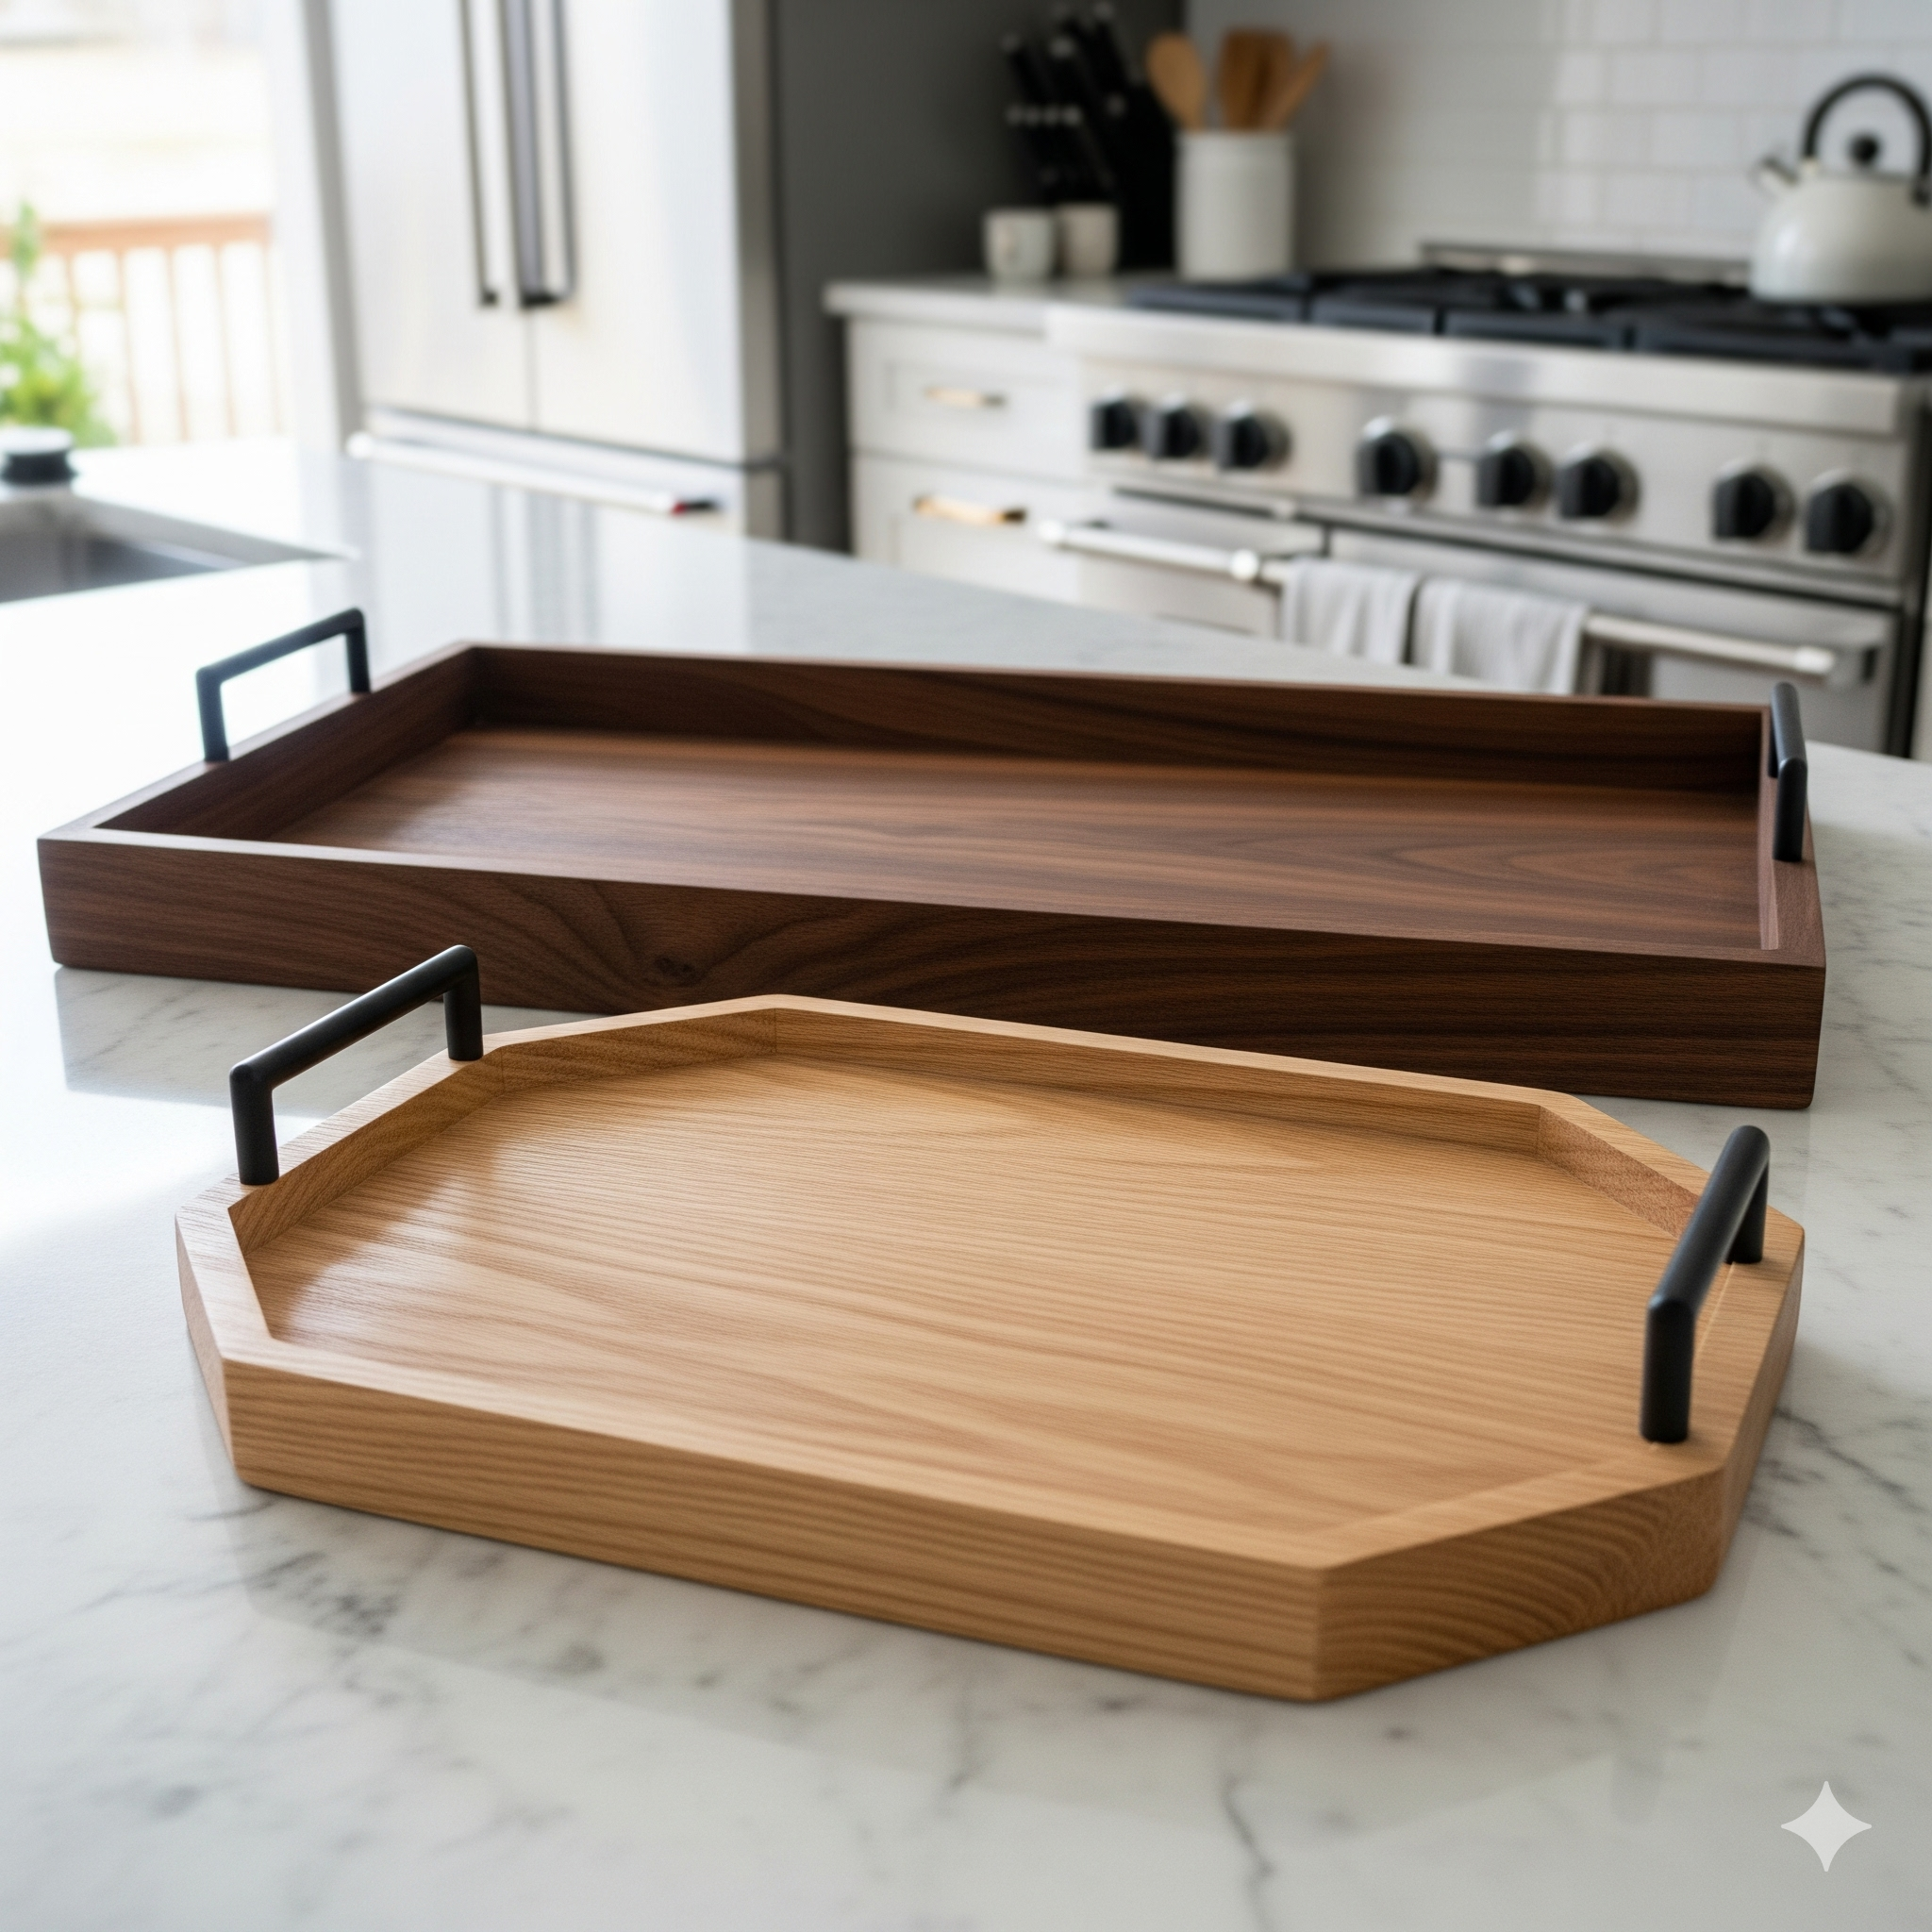
Project 9: Wooden Serving Trays
Why they sell: A beautiful serving tray is both a functional item and a piece of home decor. People use them for breakfast in bed, organizing a coffee table, or serving guests.
- Materials: A 1x12" board for the base, 1x3" boards for the sides, wood glue, brad nails, two cabinet handles, finish.
- Steps:
- Cut Base: Cut the 1x12" board to your desired tray size (e.g., 14"x20").
- Cut & Miter Sides: Cut the 1x3" side pieces to fit around the base. For a professional look, cut the ends at a 45-degree angle (miter cut) so they form perfect corners.
- Assemble: Glue and nail the side pieces to the edges of the base.
- Attach Handles: Measure and drill holes for the cabinet handles. Attach them securely.
- Finish: Sand everything and apply a food-safe finish if it will be used for serving food directly.
- Pro-Tip for Selling: Pair them with the rustic coasters (Project #1) as a matching entertainment set. Offer different handle styles (e.g., modern black, rustic rope).
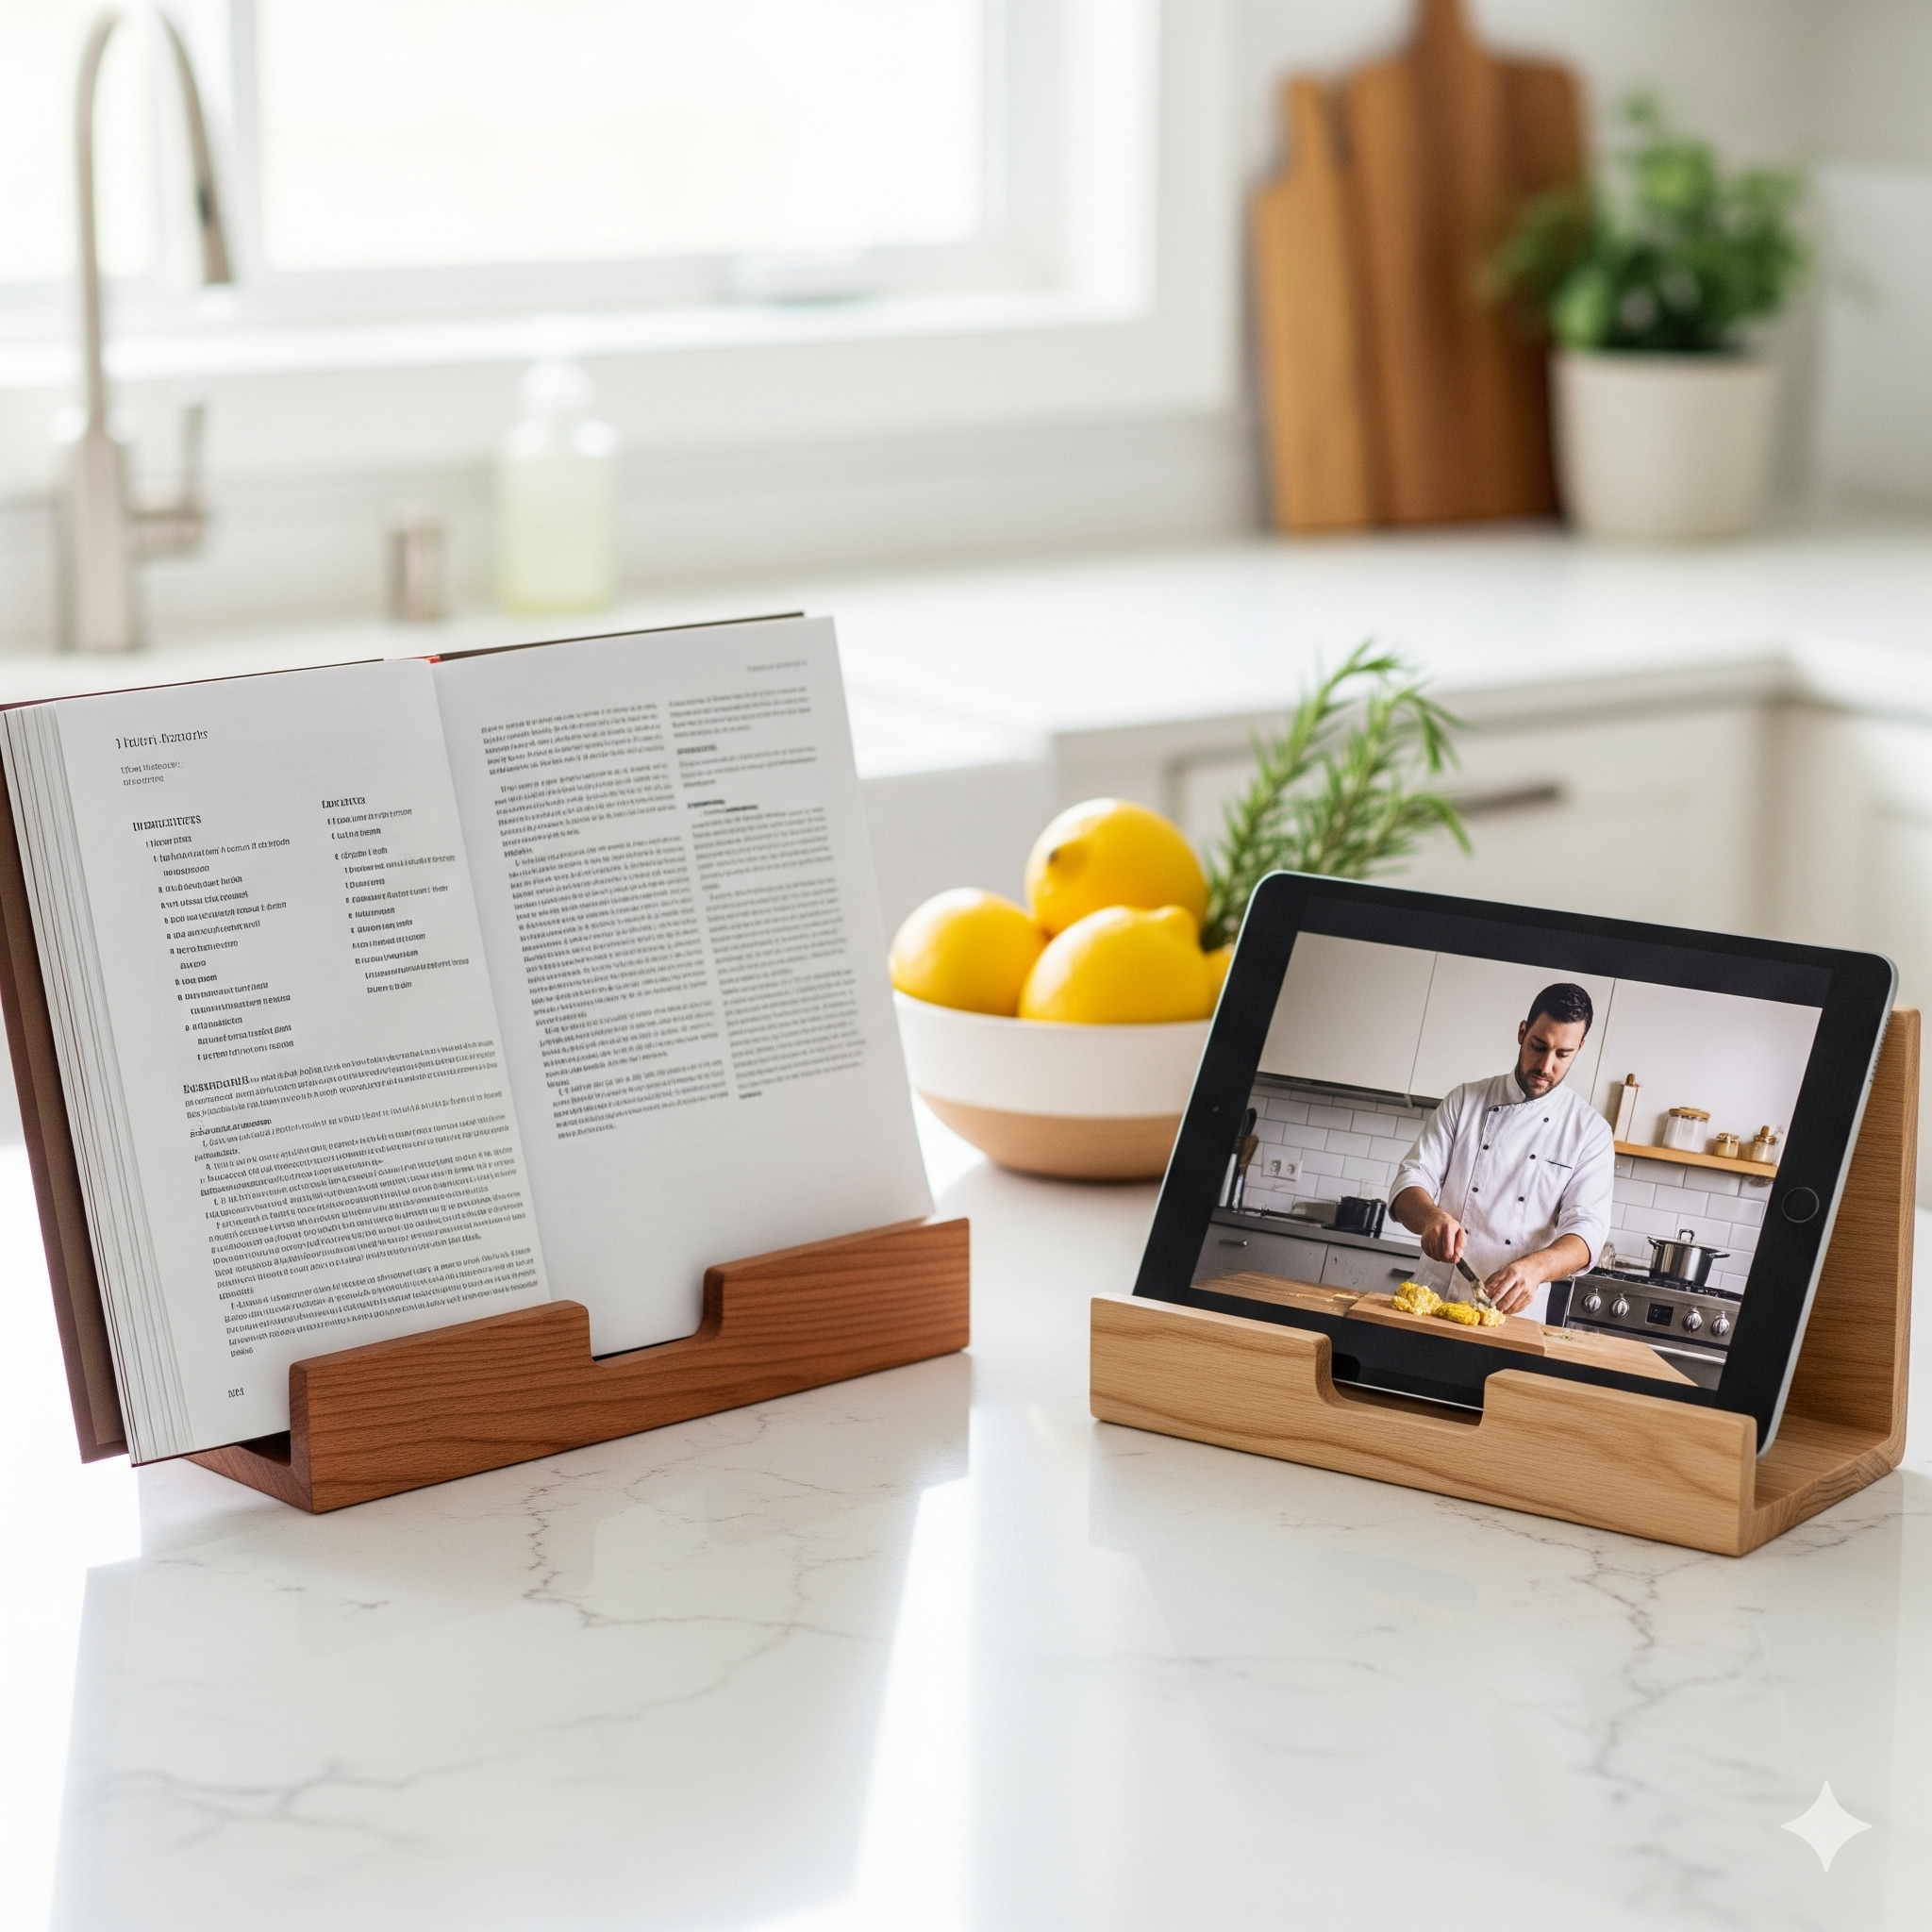
Project 10: Tablet and Cookbook Holders
Why they sell: In the modern kitchen, recipes are on tablets as often as they are in books. This stand serves both purposes, keeping expensive electronics or beloved books away from spills.
- Materials: A 1x8" board, a 1x2" board for the front lip, wood glue.
- Steps:
- Cut the Back: Cut the 1x8" board to about 12" tall.
- Cut the Base & Lip: Cut a base from the same 1x8" board (about 4" deep). Cut the 1x2" board to the same width as the back/base (about 7.5").
- Assemble: Glue the back piece to the base piece, forming an "L" shape. A simple triangular support piece can be added to the back for strength. Then, glue the 1x2" lip onto the front edge of the base.
- Sand & Finish: Sand all surfaces and apply a durable, easy-to-clean finish like polyurethane.
- Pro-Tip for Selling: Create a slot in the base that allows a charging cable to pass through, adding a key feature for tablet users.
Next Steps: Start Building Your Business
You now have 10 proven woodworking projects that sell.
The key to success isn't knowing how to build all of them. It's choosing one, mastering it, and getting it listed for sale.
Don't wait for the perfect workshop or all the fanciest tools. Start with what you have. Build a set of coasters or a phone stand this weekend. Take great photos. List it on Etsy or Facebook Marketplace.
The journey from hobbyist to business owner starts with a single cut. Pick a project from this list and make that cut today.
Frequently Asked Questions
Cutting boards and bathtub caddies are often the most profitable. They use relatively inexpensive materials but can be sold at a premium price point because they are perceived as high-value, gift-worthy items.
Start with online marketplaces like Etsy, which have a built-in audience searching for handmade goods. Also consider Facebook Marketplace for local sales (no shipping!) and local craft fairs or farmer's markets to sell in person.
Pine is typically the most affordable and widely available wood. It's great for rustic or farmhouse-style projects like crates and shelves. For items that need more durability or a higher-end look, Poplar is an excellent budget-friendly hardwood.
A common formula is: (Cost of Materials x 2) + (Your Hourly Rate x Time Spent) = Wholesale Price. Then, Wholesale Price x 2 = Retail Price. Don't forget to research what similar items are selling for on platforms like Etsy to ensure your pricing is competitive.
Absolutely not! Many successful woodworking businesses started in a small corner of a garage, a basement, or even on an apartment balcony. For the small projects listed here, you only need a small, dedicated workbench area.
Use natural light whenever possible—shoot near a bright window. Create a clean, simple background that doesn't distract from the product. Stage the item to show its use (e.g., a plant on the plant stand) and take shots from multiple angles, including close-ups of the wood grain.
A random orbital sander. While you can sand by hand, a good sander will save you hours of labor and produce a much more professional, smooth finish. It's a game-changer for elevating the quality of your work quickly.
This Simple 2x4 Woodworking Project is Surprisingly Profitable to Sell
"Enjoy this curated video. All rights and credit go to the original YouTube creator."